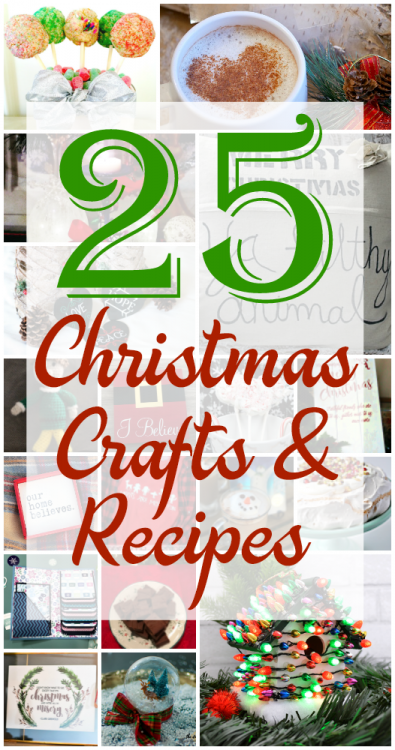
It’s the most wonderful time of the year – time for the annual 25 Days Of Christmas Movies Blog Hop! #ChristmasMoviesHop
We have 25 talented bloggers gathered together to share with you all the wonderful crafts and recipes you can make this Christmas season, based off of some of the most beloved holiday classic films. There are 25 films to be inspired by for your holiday season, and 25 talented bloggers to aid your inspiration! If you love Christmas movies, you have come to the right place!!
Don’t miss the giveaway at the end!
Let’s Meet The Hosts!

Megan ~ C’mon Get Crafty | Erlene~ My Pinterventures | Lindsay ~ seeLindsay
Marie ~ The Inspiration Vault | Maureen ~ Red Cottage Chronicles | Emily ~ Domestic Deadline
Stephanie ~ The Tip Toe Fairy | Rebecca ~ The Moments at Home | Michelle ~ Our Crafty Mom
Pam ~ P.S. I Love You Crafts | Sue ~ A Purdy Little House | Heather ~ The Busy Gifts
Erica ~ 5 Little Monsters | Valerie ~ Occasionally Crafty | Sara ~ The Holy Mess
Tina ~ Sweet and Salty Sisters | Sam ~ Raggedy Bits | Christine ~ Where the Smiles Have Been
Allie ~ Vigor it Out | Lyne ~ Lynn’s Everyday Ideas | Evelin ~ Evey’s Creations
Nina ~ Crazy for Cookies and More | Carrie ~ A Princess and Her Pirates
Jaclyn ~ The Dotted Nest | Kelley ~ Simply Inspired Meals
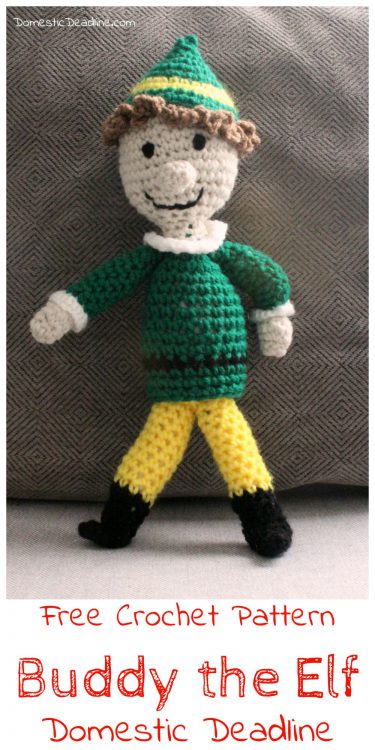
Crocheted Buddy the Elf
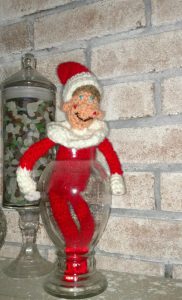
There are so many Christmas movie I love. Elf always makes our whole family laugh. Several years ago I crocheted Elfis, our Elf on the Shelf. O-Man loves him so much. One year the only thing he asked for was to be able to play with Elfis! Thankfully, Santa decided to grant him one week to be able to play with Elfis and O still talks about it to this day.
As much as O-Man loves my first attempt at crocheting an elf, the pattern didn’t turn out exactly as I had hoped. The 25 Days of Christmas Movie Blog Hop was the perfect excuse to create my own pattern. This time a Buddy the Elf version!
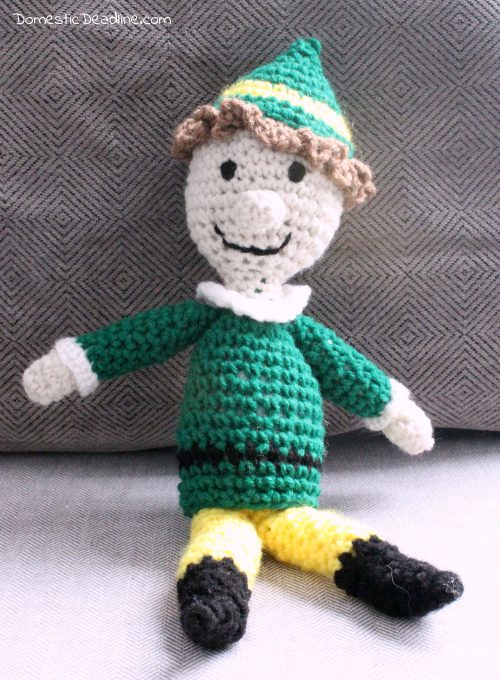
Since the first elf, I’ve made quite a few amigurumi. There definitely is a skill to crocheting amigurumi, but they are a lot of fun and are really very basic in the stitches. I have so much yarn to use in my house, so I created Buddy without needing to buy anything!
So, if you can do a single crochet stitch, then give this little guy a try.
Supplies and Stitch Guide
To make Buddy I used Red Heart yarn and a 4.25mm crochet hook. He’s filled with poly stuffing and pipe cleaners to make his arms and legs bendable. If I make another one someday, I’ll use safety eyes. I bought some of those after I had already made his head.
For the head and hands I used a creamy off-white. A peach would have worked also, but then I would have had to purchase more yarn!
Black, white, green and yellow yarn are used for his clothes. Brown yarn was used for his hair.
This elf doesn’t have to be Buddy from Elf. He can easily be changed to whatever colors you want like traditional red and green. If you want him to have hair the same color as your child’s, then use a different color for his hair. The options really are endless.
Someday I’ll probably make another one with a skirt. But for now, two elves in our house is plenty!
When crocheting amigurumi, it’s best to make your stitches as tight as possible. If using a smaller hook helps, then go that route. Use a stitch marker to help keep track of the rows since the rows are worked in a continuous circle, no joining at the end of each row.
Here are the abbreviations I’ll be using in the pattern:
- SC: Single Crochet
- st(s): stitch(es)
- HDC: Half Double Crochet
- FLO: front loop only; only catch the front loop of the previous row’s stitch instead of both as you normally would
- BLO: back loop only, same as above, but the back loop
- 2tog: 2 stitches together; this is used for reducing the stitches in a row. Insert the hook into one stitch, yarn over (YO), and insert the hook through the next stitch. Then yarn over and pull through all the loops on the hook.
- 3tog: 3 stitches together (see above)
- Stitch counts are given at the end of each row to guide you.
- R: Row
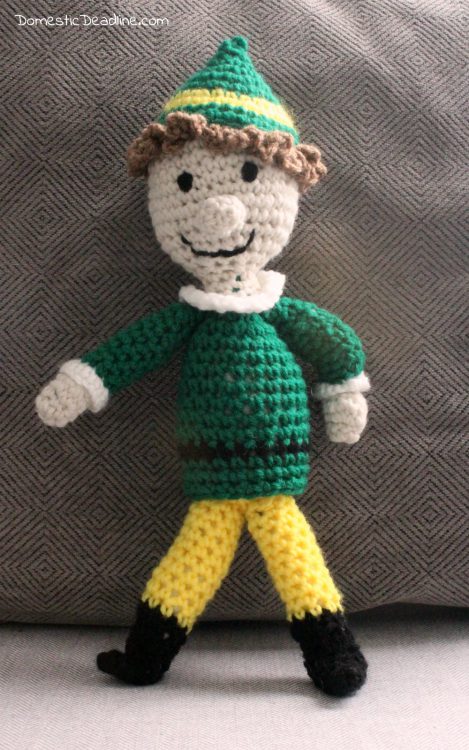
Head, Neck, and Body
The head, neck, and body are all worked as one piece, but colors will change. The rest of the parts are made and sewn on later.
- R1: Begin with a magic circle with 6 sts
- R2: 2 SC in each st (12)RR3: *1 SC in first st, 2 SC in next st. Repeat from * (18)
- R4: *1 SC in first and second sts, 2 SC in third st. Repeat from * (24)
- R5: *1 sc in each of the first 3 sts, 2 SC in the next st. Repeat from * (30)
- R6: *1 SC in each of the first 4 sts, 2 SC in the next st. Repeat from * (36)
- R7-11: 1 SC in each st (36)
- R12: *1 SC in each of two sts, 2tog. Repeat from * (27)
- R13: 1 SC in each st (27)
- R14+: 1 SC then 2tog. Repeat that pattern, working to reduce the stitches over the course a few rows until left with a row with only 8 sts. If using safety eyes, add them now. Stuff the head before it gets too small, so if you feel you need to stuff the head before reducing to only 8 stitches, then stuff when best for you.
- For the neck: 1 SC in each st for 2 rows. Tie off and switch to white yarn.
For the collar, using white yarn
- R1: 1 SC in each st (8)
- R2: 2 SC in FLO of each st (16)
- R3: 2 SC in each st (32)
- Slip stitch and tie off the white yarn, weave in end
For the body, using green, start under the collar in the back loops of the R1 (white yarn)
- R1: 1 SC in BLO of each st (8)
- R2: 2 SC in each st (16)
- R3: *1 SC in first 3 sts, 2 SC in 4th st. Repeat from * (20)
- R4-8: 1 SC in each st (20)
- R9: Without cutting off the green yarn, switch to black yarn to make his belt. 1 SC in each st. Tie off black yarn. (20)
- R10-11: Switching back to green yarn, 1 SC in each st (20)
- R12-13: 1 SC in FLO. Tie off green yarn and weave in end (20)
- R14: Using yellow yarn, in the BLO of R11, 1 SC in each st. Stuff body. (20)
- R15+: 2tog until the opening is closed. Tie off yellow yarn and weave in ends.
Legs
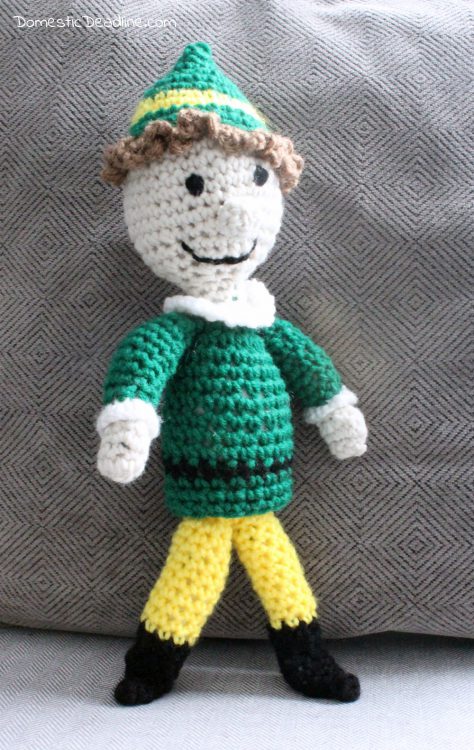
Make 2 legs. Once they are finished, fold a pipe cleaner in half and then fold up one end until the pipe cleaner is the length of the leg. This helps make the foot. Put the pipe cleaner into the leg and then stuff with fiber-fill. Using a yarn needle sew to the yellow of the body.
- R1: With black yarn, magic circle with 3 sts (3)
- R2-3: SC in each st (3)
- R4: 2 SC in first st, SC in each of the remaining sts (4)
- R5: SC, 2 SC, SC, 2 SC (6)
- R6-8: SC, SC, 3 HDC, SC (6)
- R9: SC, SC, 2 SC, SC, 2 SC, SC (8)
- R10: SC in each st. Tie off black yarn and tuck end inside. (8)
- R11: Using yellow yarn, SC in each st (8)
- R12-19: SC in each st. At the last row, tie off and leave a long tail for sewing to the body (8)
Arms
Make 2. The arms start at the hands (with thumbs), get a white ruffle and then move onto his green sleeves. Use pipe cleaners and stuff the same way as the legs. The arms are sewn to each side of the body just below the collar.
- R1: With face color, magic circle with 4 sts (4)
- R2: 2 SC in each st (8)
- R3: SC in each st (8)
- R4: 3 SC in 1st st, 3 SC in next st, SC in each of remaining 6 sts (12)
- R5: 3tog, 3tog, SC in each remaining sts (8)
- R6: 2tog, SC in remaining sts (7)
- R7: SC in each st. Tie off and stuff tail into hand (7)
- R8: With white yarn, in FLO 2 SC in each st. Tie off and weave in end (14)
- R9: With green yarn, in BLO of R7, 2 SC and then SC in the remaining sts (8)
- R10-15: SC in each st (8)
- R16: 2tog, SC in each remaining sts (7)
- R17: SC in each st (7)
- R18: 2tog, SC in each remaining sts (6)
- R19: SC in each st. Tie off and leave a long strand to sew to the body (6)
Hat and Hair
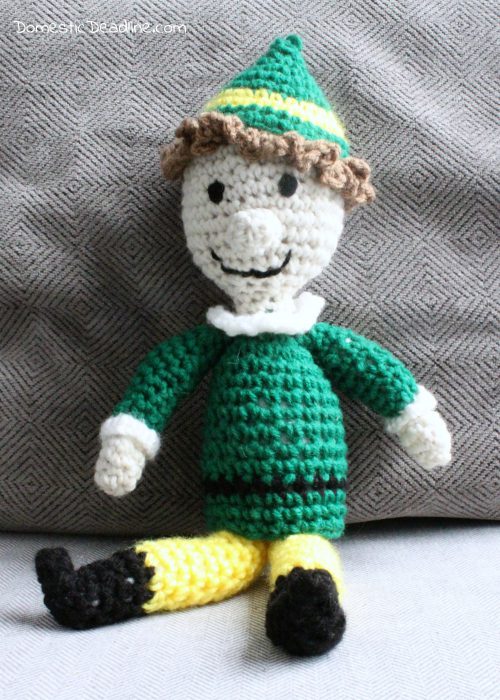
The hat is going to be green with a yellow stripe. Buddy’s hair is attached to the hat. Once finished, stuff the hat and sew to the head, hiding the stitches in the hair.
Using green yarn, chain 3 and join.
- R1: SC in each st (3)
- R2: SC, 2 SC, SC (4)
- R3: *2 SC, SC. Repeat from * (6)
- R4: *SC, 2 SC. Repeat from * 2 times, SC (10)
- R5: *2 SC, SC. Repeat from * 4 times (15)
- R6: *SC, 2 SC. Repeat from * 6 times (21)
- R7: SC in each st (21)
- R8: Leaving green yarn attached, switch to yellow yarn. *SC, SC, SC, 2 SC. Repeat from * 2 times, SC, SC (27)
- R9: SC, 2 SC, *SC, SC, SC, 2 SC. Repeat from * 6 times (33)
- R10: SC in each st (33)
- R11: *SC in each of 9 sts, 2 SC in 10th st. Repeat from * 3 times, SC in each of last 4 sts. Tie off the green. (37)
- R12: Switching to brown or hair color of your choice. In BLO (the inside of the cap) SC, then chain 3-5 times and SC back in the same loop. Repeat this process around the head varying between 3-5 chains to make the curls. Tie off and leave a long tail to sew to the head.
Nose, Eyes, and Mouth
If you didn’t use safety eyes, use black yarn to stitch eyes and a smile on Buddy’s face. I stitched the eyes and mouth after sewing his nose into place.
Nose:
- R1: Magic circle with 4 stitches (4)
- R2: 2SC in each st (8)
- R3-4: SC in each st (8)
- R5: 2tog, adding a bit of stuffing as the hole closes up. Tie off and leave a long tail to sew onto his face (4)
Now let’s check out the rest of the amazing Christmas creations!
Pin and Share







9 Comments