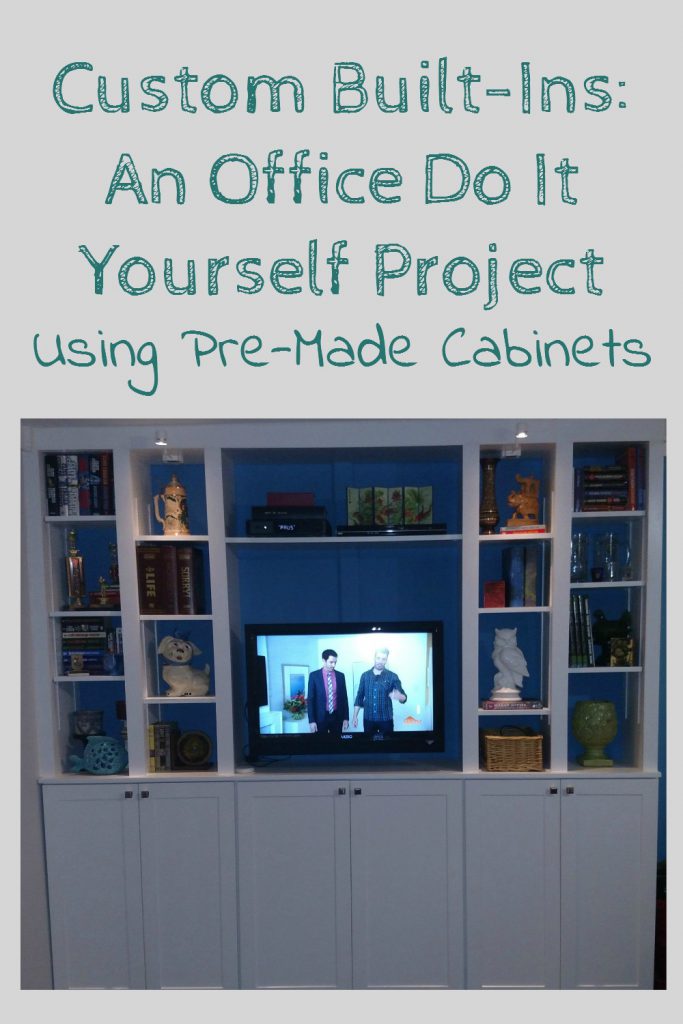
Before the ink was dry on our offer for our new house, IronFish was dreaming of custom built-ins for what would become his office. I’m not about to let a DIY project pass me by, so of course, I started planning with him. Function was the main concern, but we also wanted it to look really nice.
Custom Built In-spiration
Are you sensing a theme? White, organized, displaying books, storage, painted back wall.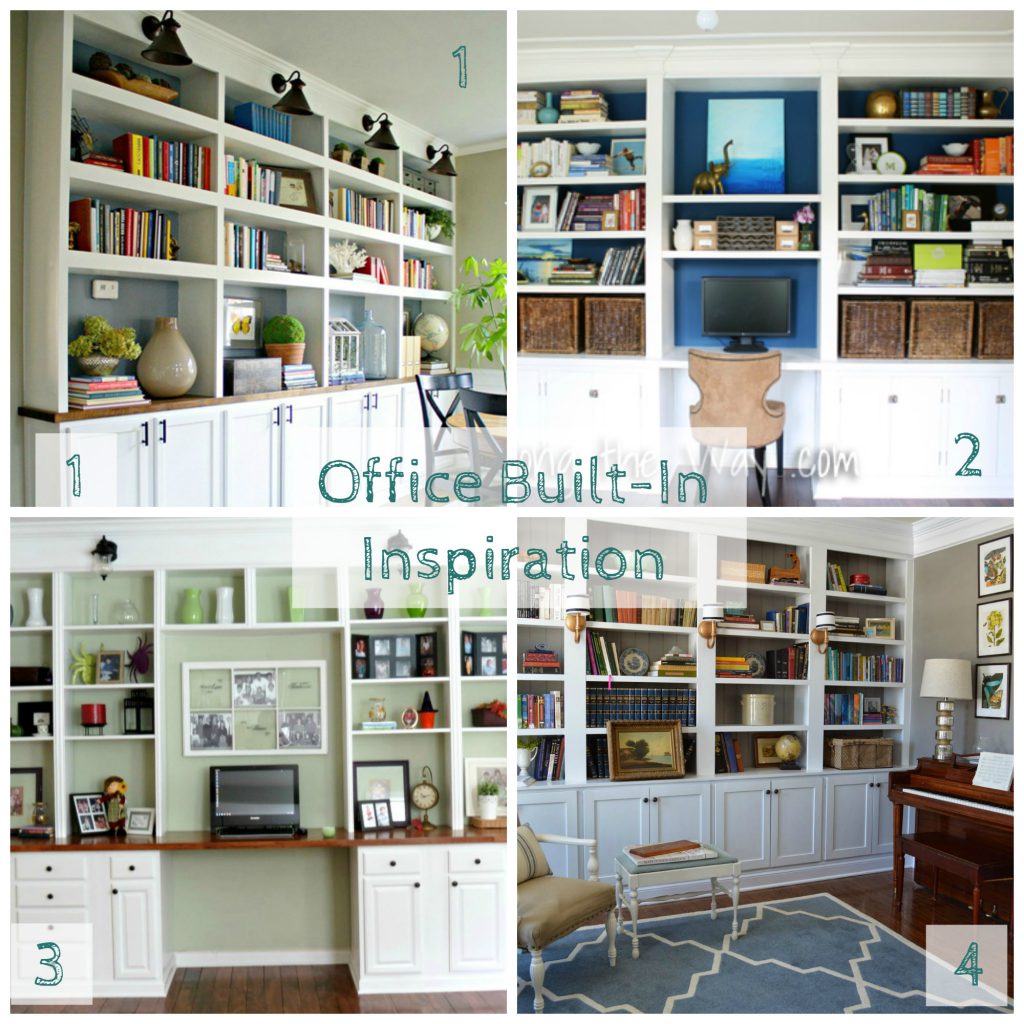
You can see more about each of these below:
Our Turn
With paint on the walls and the floors laid, we made our final measurements and drew out our design. We decided it would be best for our budget and timeline to use kitchen cabinets for the base of our custom built-ins. I ordered our materials; we just needed to find a weekend to do the work.
Halloween fell on a weekend, so IronFish dressed up as a construction worker. Complete with an actual construction project while he handed out candy!
Built-In Base
We knew we wanted to cabinets to be off the floor a bit. This way an area rug wouldn’t interfere with the doors. Plus, the new base molding in the whole house. It made sense to use this as our height for raising the cabinets up.
Building a base out of 2×6 enabled us to make sure the base molding could just continue from the wall, around the cabinets, and back to the wall again.
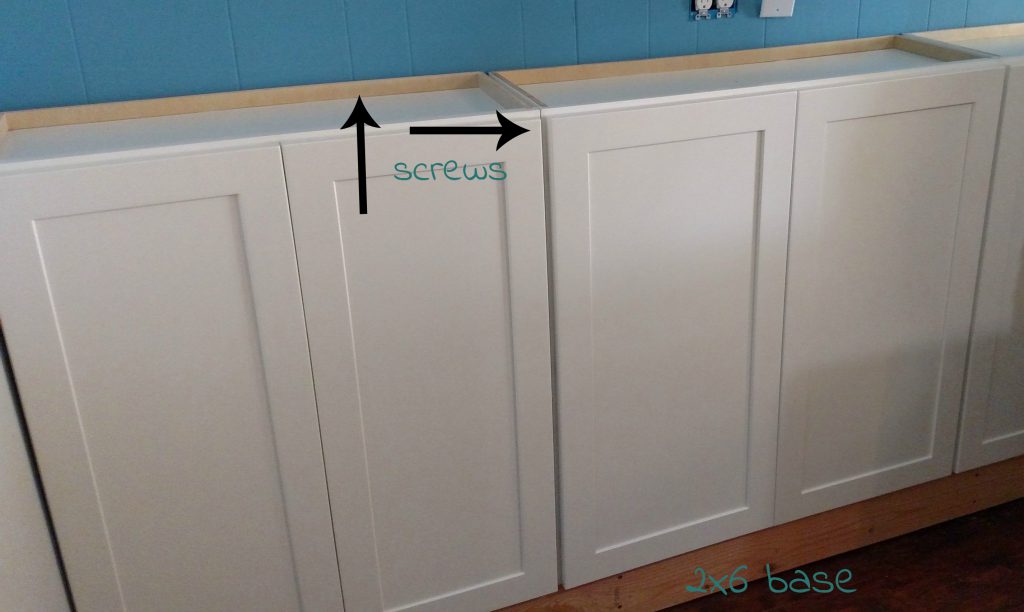
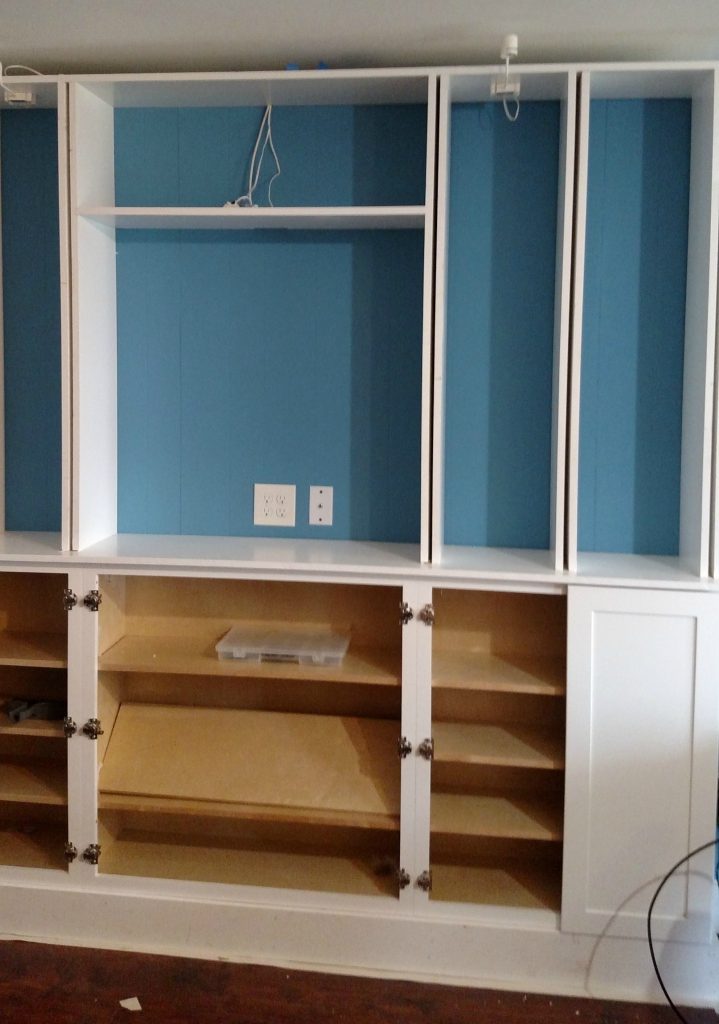
Once the foundation was built, place the cabinets on top was pretty simple. The trick to stability and a professional look is to not only screw the cabinets to the wall, but to each other. Using a counter sink bit, the heads of the screws won’t interfere with the doors. Catching studs to secure the cabinets to the wall will mean they really are built into the room.
Building the Open Shelving
This is mostly what IronFish was working on during trick or treating. He designed and calculated exactly what he wanted the open shelving to look like. Space for the television and other media was his main requirement. After that he wanted shelves to be able to display and store books and other treasures that made the room his.
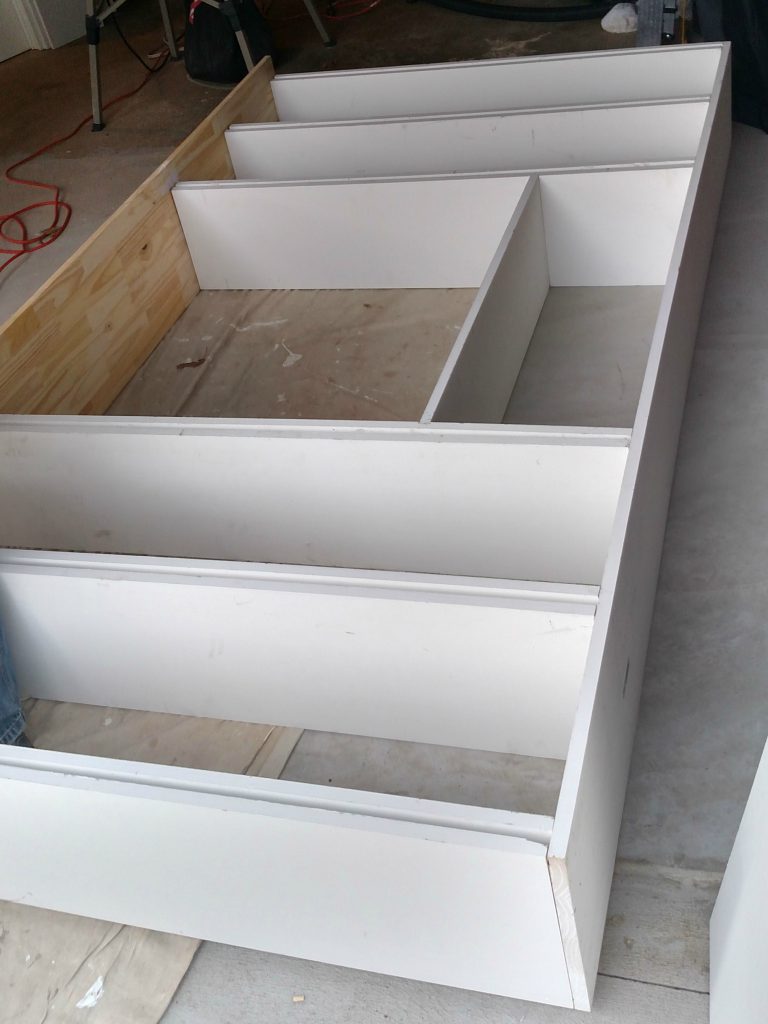
The top piece was built laying down on our garage floor. Most of the wood we used was pre-primed. This saved us time painting and is less expensive than stain grade wood. We painted the top with a gloss finish Benjamin Moore white, the same as the trim in the whole house.
The kitchen cabinets we used came prefinished and the white finish matches my favorite trim paint. It couldn’t be more perfect.
Lighting
Lighting was another requirement for IronFish. Since we were going to be building this to meet our needs, it only made sense that we include lighting from the very beginning.
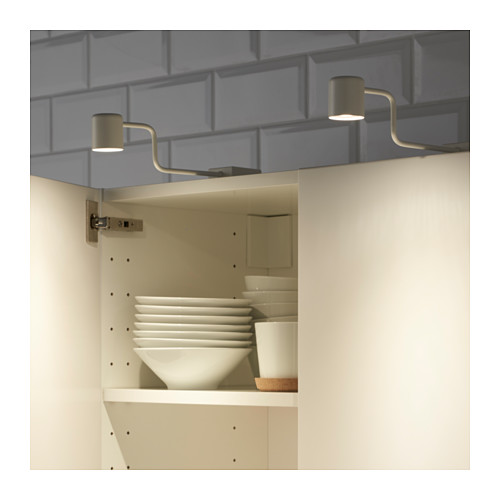
I loved the look of library lights like this
Or sconces like this

But that was all a bit too much for IronFish. I was thrilled when I found these lights at Ikea. Not only did they fit his needs, but my desire for a library light look. And they are controlled by a remote control!

Final Assembly
Once the upper shelves were completely assembled, everything got a final coat of paint. Then we added the lights and the shelf tracks. The whole upper unit was then moved into the house. Since IronFish and I did the moving, there is no picture of this!
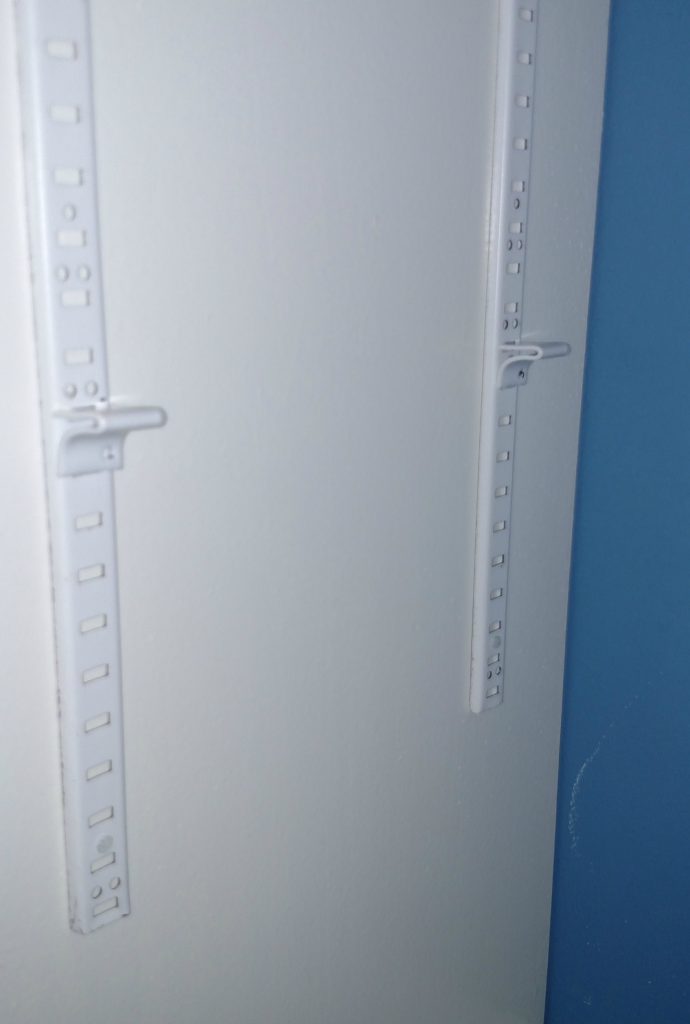
The shelf tracks use clips that can be moved anywhere we want. While we knew the media area in the middle would house a 36″ TV, we didn’t have an exact plan for what was going on the other shelves. These were to be display areas and I felt that the items displayed might change over time. Therefore, using adjustable shelves was the best option.
With everything in place and our trusty nail gun in hand, we trimming out the whole unit was a breeze. Caulk and final paint touch up and it was ready to go. Oh, and the TV was installed immediately!
Display
As I put books, trophies and other various collections into the shelves, I adjusted them for height. Maximizing the space and creating balance without having the shelf heights balanced was fun; kinda like a puzzle.
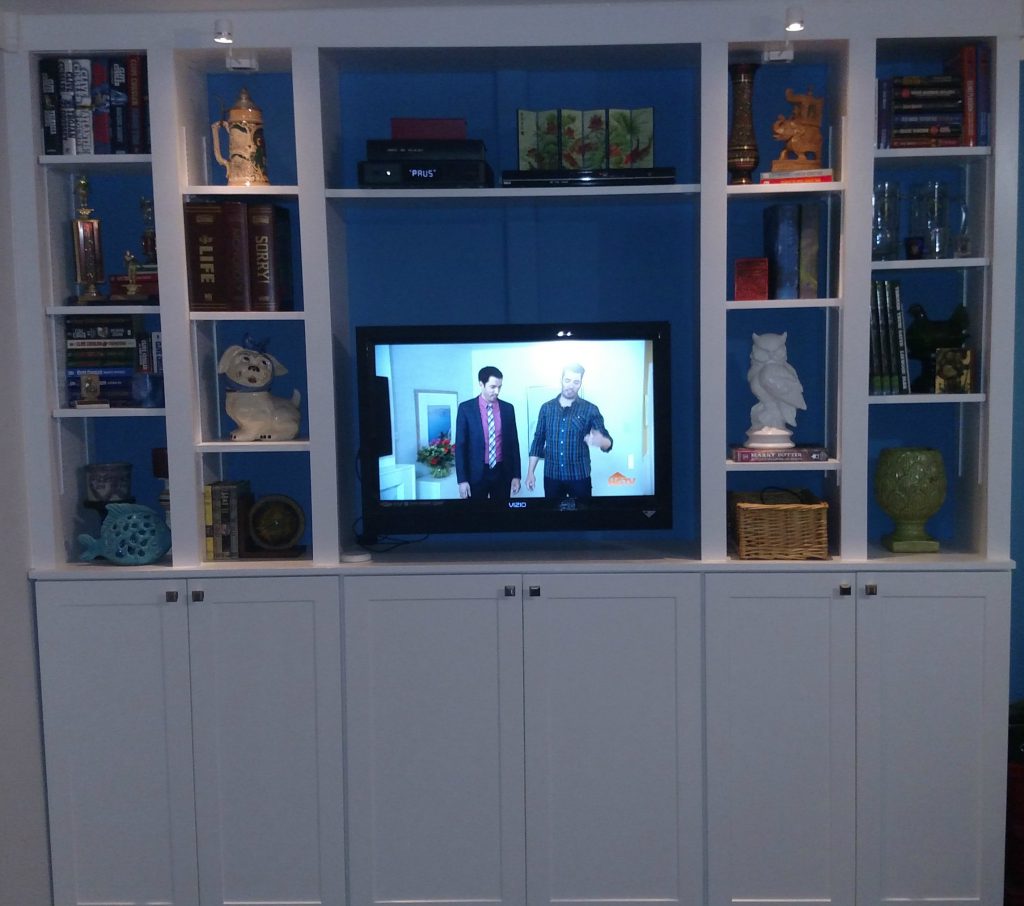 A year later and this room is still a favorite of everyone’s. Favorite authors, high school swimming trophies and fraternity shot glasses mix with a graduate thesis, family heirlooms, travel finds and even a thrift store owl (spray painted white to be our very own Hedwig).
We love how this turned out so much we are planning on using the same cabinets to customize our mudroom.
Hey Emily~ I love your built-ins. They came out beautiful! I love the blue background. BEAUTIFUL! I’m so glad our built-ins could inspire you a little bit. It’s the whole reason I do what I do. If I can a particular project, anyone can do it! Great job!!
God Bless~Linda from HOme is Where My Heart is <3
Thank you! We love how they turned out so much.
These are amazing. You did a great job and I love how they look.
Thanks, it was a lot of work, but so worth it!
This looks great! I love built-ins!
Thank you, we really love them
These look fantastic. Boy I wish I had the space to do that in my house. Nicely done!
Wow! They look awesome! You did a great job!
Thanks, so worth the work
Wow! This looks amazing! I need some built ins in my house!
Thank you, we really love them.
Your built ins look great! I would love to be able to do that in our space. The blue background is such a nice touch!
Hubby picked the blue and we all love it
I can totally appreciate a good storage solution! This turned out quite well 🙂
Storage is always a must for me!
I really love how you pulled this together! Such a fabulous DIY and I love the painted background.
Thanks, I love the blue
Great work and inspiration! Best wishes Linda @Crafts a la mode
Thank you!
Wow this turned out great!!
Thank you!
You guys did a great job. Looks like it is professionally done. Great to be co-hosting with you. #HomeMattersParty
Thanks so much!
What a great DIY built in shelving system. I love it! I need more shelves around my house. #HomeMattersParty
I don’t think there can ever be enough shelves!
Wow you did an amazing job, I can’t imagine trying this on my own, I’m going to have to save this for later, we are moving soon! thanks for Sharing! #homemattersparty
With some planning, it wasn’t soo bad. I’m going to help my neighbor plan to do something similar in her house!
These are just beautiful Emily! Thanks for cohosting #homemattersparty
Thank you so much, I’m really having fun being a cohost!
We did this in our previous home and I so want to do it again. Looks amazing.
Thanks! My hubby is already looking for other places to do built ins!
These cabinets look amazing! It’s great how easily you were able to customize them to fit your needs. 🙂 Thanks for sharing and co-hosting at the #HomeMattersParty
~Lorelai
Life With Lorelai
Thanks! I really enjoy co-hosting!
This is such a great idea. I really love your blog, Emily. I find myself commenting on a lot of recipe blogs when I am visiting link parties, but when I clicked on your post I decided that I would leave a comment here and then bookmark your blog, and of course share and pin. I love DIY ideas, especially when they are good ones. Thank you so much for sharing at the Pin Junkie link party.
Thank you! I used to do more recipes, but until my kitchen is renovated, I really don’t like being in there to cook, lol! I’ll be using the same cabinets in my kitchen reno this summer.
Those really look great. There’s nothing better than pretty storage!
Thanks for sharing at Waste Not Wednesday.
Your built in unit looks amazing and I love good storage
Look at all that wonderful new storage!! You got to love it. Its fresh and pretty and practical. You certainly broke a huge task down into manageable steps and made it look much more achievable. The work you put into it is sure worth the $3000 savings I bet.
So awesome! Thanks for contributing to the To Grandma’s House We Go Link party this week! Be sure to follow us and we’d love to see you next week!
Your built-in looks amazing. I love the white finish, it makes everything look fresh. Thanks for sharing on Sunday’s Best.
I love how crisp and clean white looks!
Wow! Love how your built-in turned out! Everything looks so organised and those overhanging lights are a brilliant idea!!
Thank you so much for sharing your fabulous project with us over at Waste Not Wednesday!
Wonderful project! The build in looks amazing, you did a great job!
Thank you!
I need to do one of these for our house, sending Hubby off to the DIY store this weekend haha!
Thank you for sharing this with us at #TriumphantTales. I hope to see you back next week!
Wow, that is so cool. Thanks for sharing. #TriumphantTales.
I luved the inspiration in this post. The shelving turned out amazing! I’d luv to invite you to share it with us at Wall to Wall DIY Wednesday that runs thru Mondays. Best, Ann
I will, thank you!
Awesome job! I am always looking for storage solutions and this might be something I am willing to try!