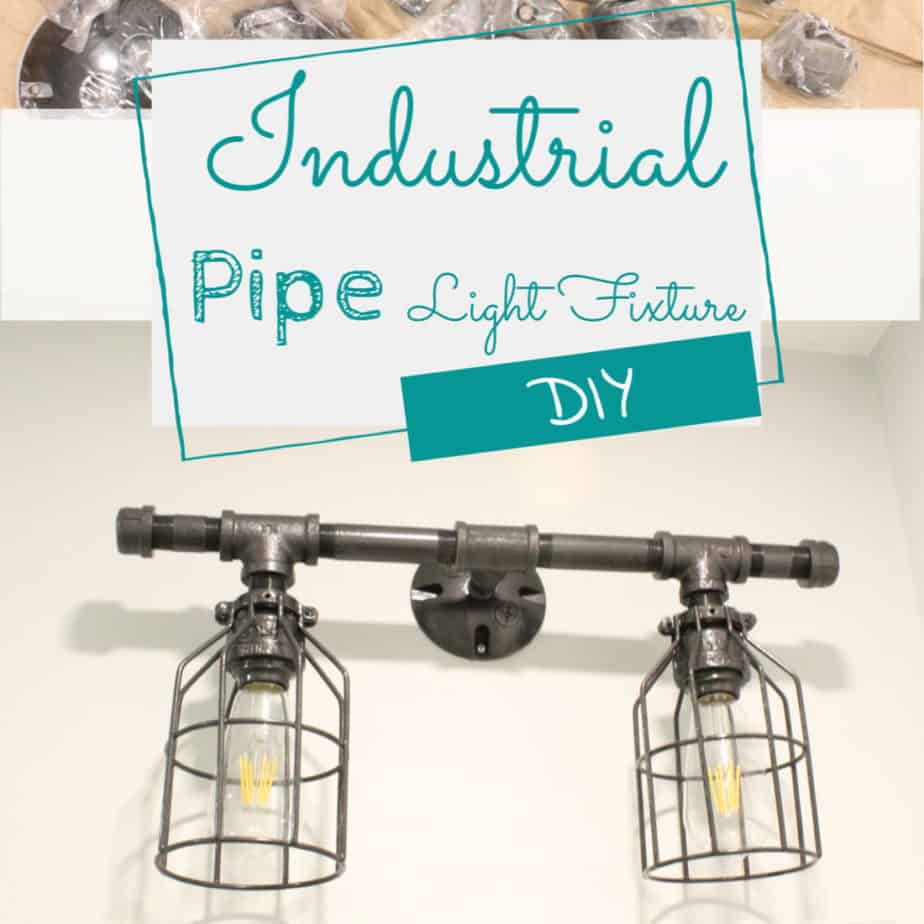
For O-Man’s bathroom, I knew I wanted to create my own light fixture. One of my many favorite projects I’ve done in this house is the pipe shelves I built for our kitchen. Rewiring lamps or other light fixtures is pretty easy. Add to that my electrical experience from work and I knew I could make something perfect. Today I’ll share the process of making a DIY industrial pipe light fixture.
Gather Supplies
I work with an amazing plumbing supply store for work. Yes, I said plumbing. Plumbing supplies is where I started with my design.
Back to the amazing store. These guys know everything about plumbing. Both Dave and I go into the shop, sometimes together, sometimes alone. It all depends on what we are doing.
You’re probably wondering what that has to do with this?
Well, they have a sign in the store saying professionals will be served first. Meaning, they can work with anyone that walks in off the street, but when a professional and a homeowner walk in, the professional will be helped first.
One day I went in by myself, with a list of parts needed. It was busy, so I patiently waited for my turn. One of the guys behind the counter, Joel, asked what I needed. A man jumped and said, “Hey, I’m a professional, you have to help me before her!”
Joel looked at him and said, “Sir, she is a professional. Plus, her company does about 50 times more business with us than you. You can wait.”
I was A-Ma-Zing!
Off-topic, but I really needed to throw that in there so you knew how great these guys are.
But everything is behind the counter and in the warehouse. Not sitting out for me to make selections from.
And, when I started this project it was after 5 pm, so I headed to the plumbing department at my local hardware store. I will include (commissioned) links to Amazon and Ace Hardware for the pieces (when possible) to make it easy for you if you would like to make one too!
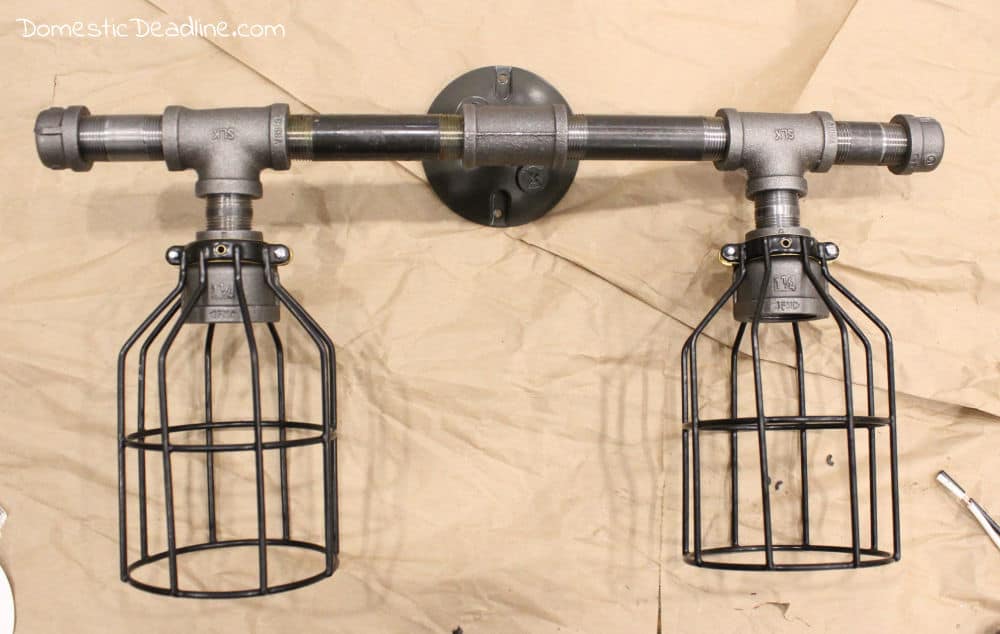
Originally, I wasn’t sure if I wanted two or three lights in the fixture. I just started playing with the ¾” gas pipes. Elbows, Ts, and a variety of lengths of straight pipe.

What’s so great about gas pipe is, first, it all screws together. Second, it’s already black and industrial looking.
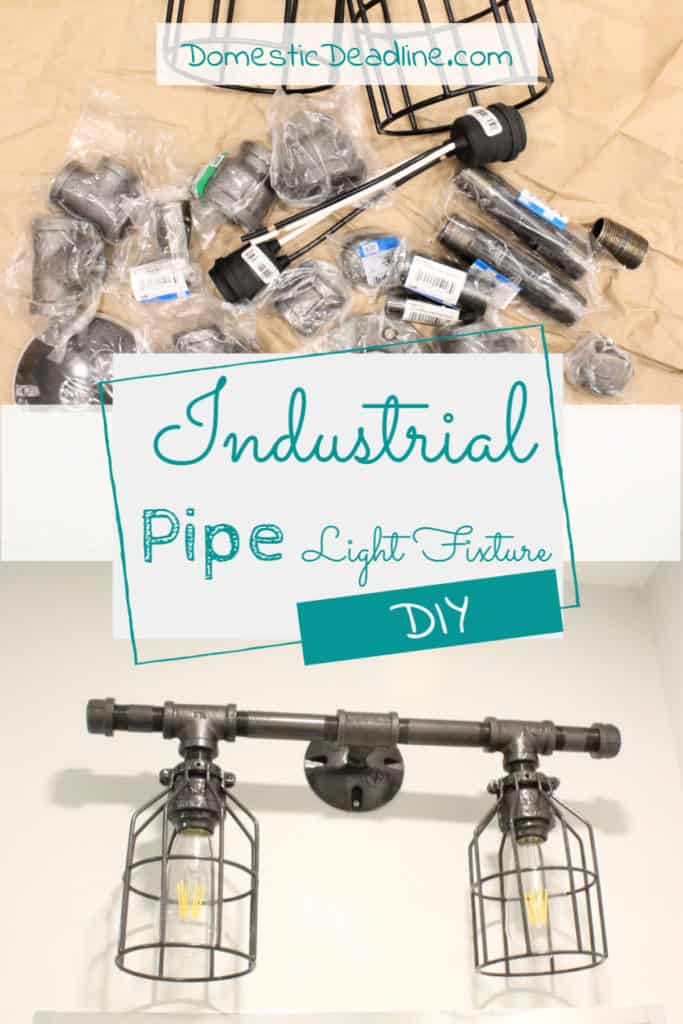
Eventually, I had a huge cart of supplies, more than I needed. It was time to take the pieces home and play.
Side story… The reason I decided to take everything home to play… An old man hung around me and kept pointing out to me “you know that’s gas pipe?”
“Yes, sir, I’m aware”
“But, it’s for gas, not electricity!” (He had asked me what I was doing in the plumbing section when he walked up to me).
I assured him I knew what I was doing. He couldn’t get past it. Getting away from him was the only way to deal with him.
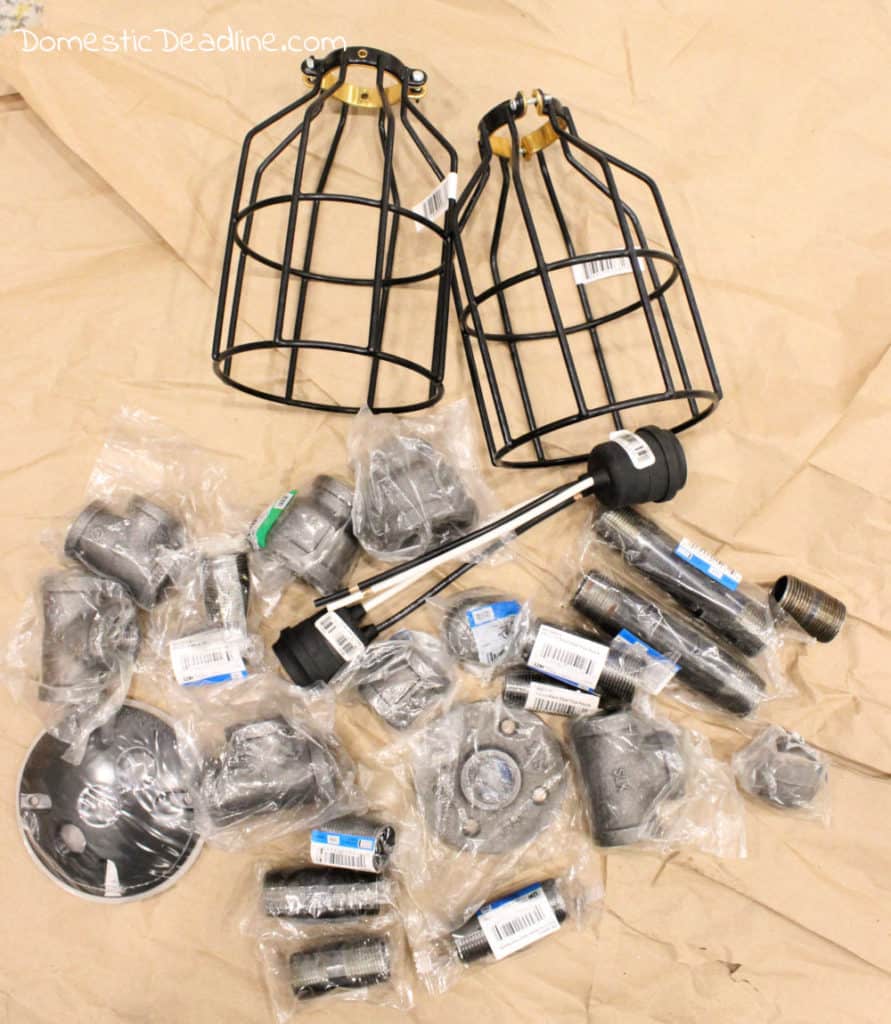
Electrical Components
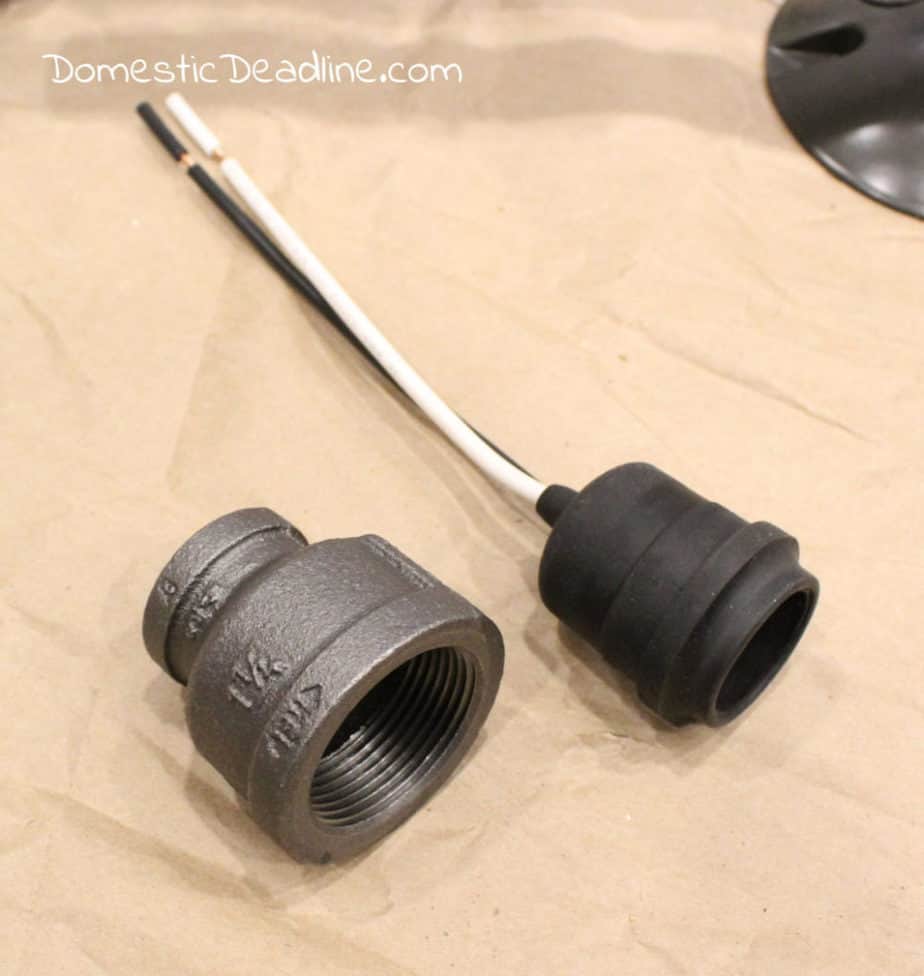
I have plenty of two-wire at home, but I needed something to screw the bulbs into to connect up my wires.

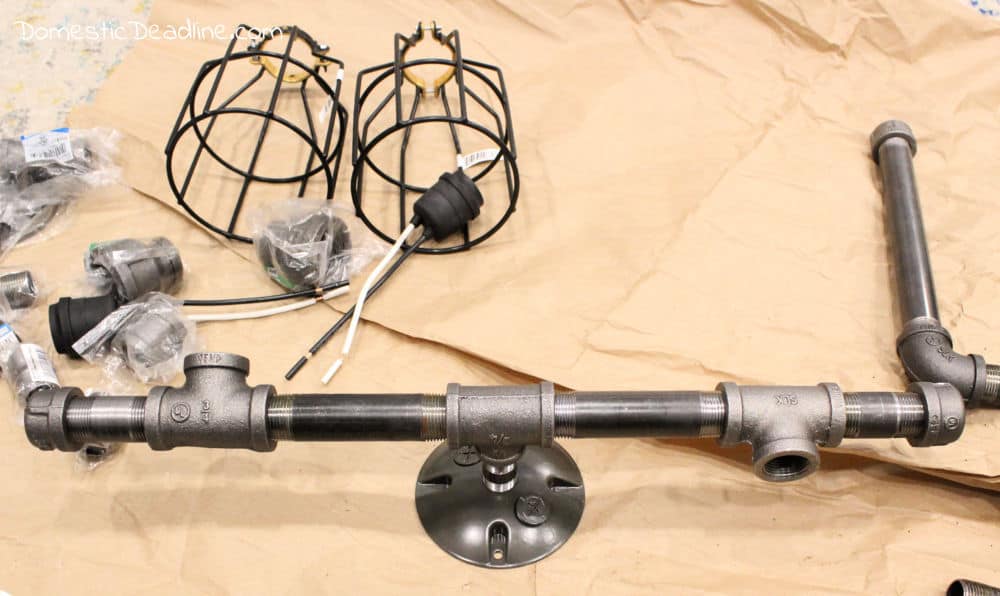
I grabbed a few sockets, a backplate, and some bulb guards.

And a can of black hammered finish spray paint. I love this spray paint. The finish it leaves is perfect for the industrial look.

Get My Tools
This is my electrical toolset, everything I need fits in one pouch!

My voltage tester also fits in the pouch and my knife is always nearby!

Design the Light Fixture
Gas pipe is a bit greasy, lay out a drop cloth over your surface before playing with the parts.
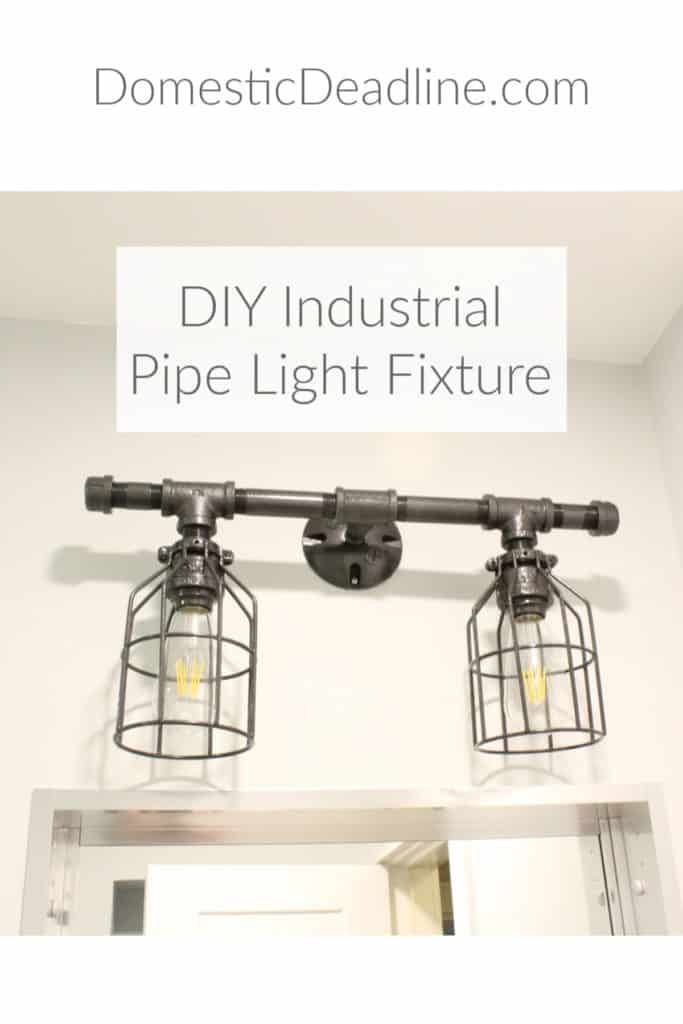
Assemble the parts. The sockets fit into the reducer coupling, so those are necessary.
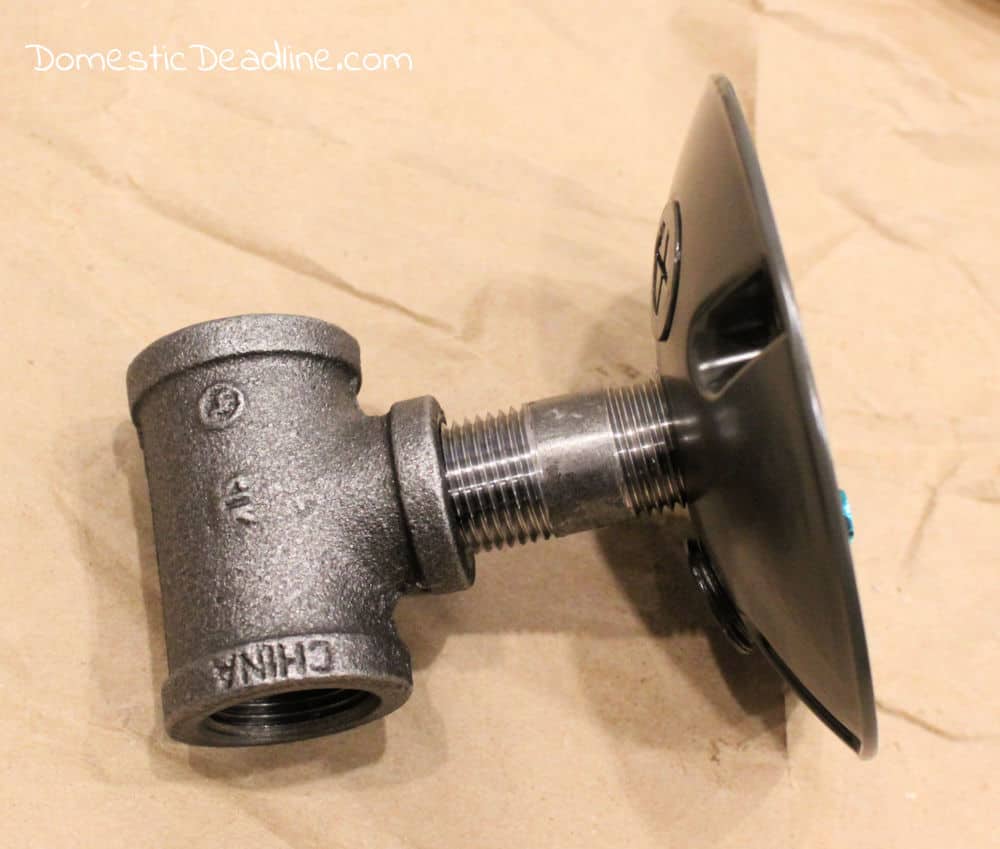
I considered using a pipe flange for the backplate, but ultimately realized it would be easier for me in the long run to use the outdoor mounting plate (similar).
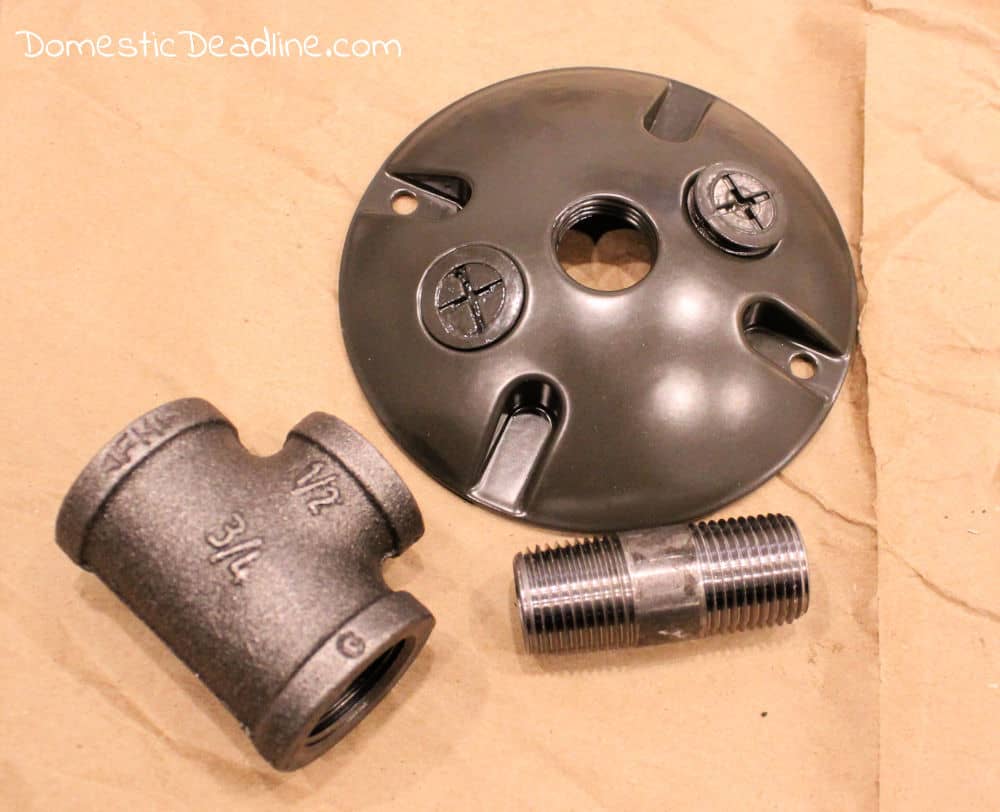
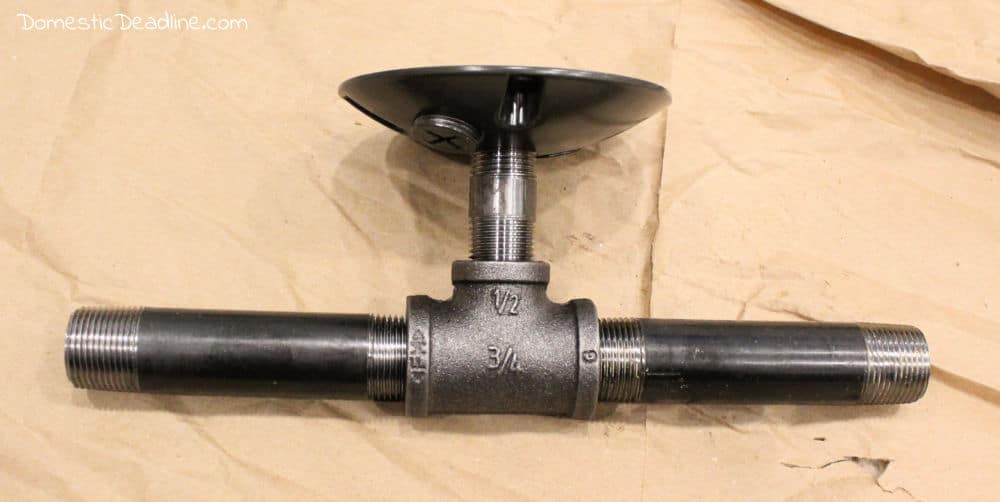
Once I decided to use two lights, a 3/4″ tee reducer and a 1/2″ x 1/2″ pipe nipple became necessary to attach the pipe to the backplate.
From there, it was a matter of trying different parts to get the look I wanted.
With my industrial pipe light fixture laid out exactly as I wanted it was time to wire it up!
Wiring
Using electrical wire cutters, cut off a length of 14 gauge 2 wire. This is called 2 wire even though there are three wires in the casing. The black is the hot wire, white is the neutral wire (those are the 2). The third is the ground wire, the copper wire without any coating.
Strip the ends to expose the wire. Attach the wire to the socket.
Small wire nuts attach black to black, white to white, and ground to ground. Twist tightly.
Push the socket into the 1 1/4″ reducer piece. Mine stayed tightly but I was prepared to glue it in place if needed.
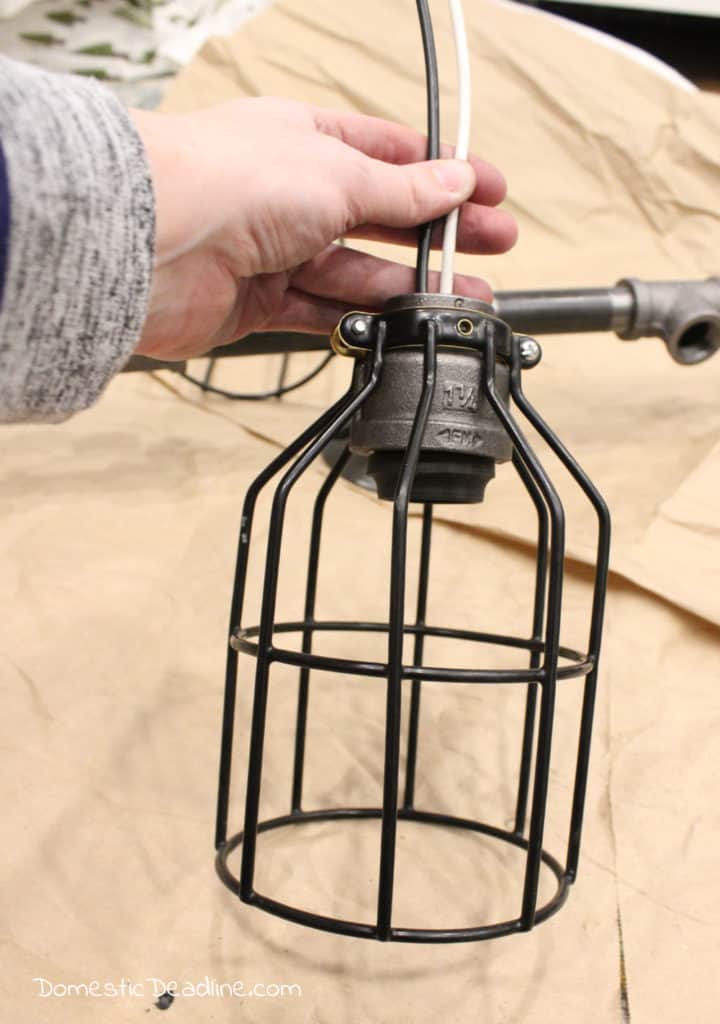
Attach the bulb guards.
Feeding the wire through the pipes, I tightened each piece as much as I could by hand. Lead the wires to the backplate.
Repeat for any additional lights. I repeated the whole process on the other side.
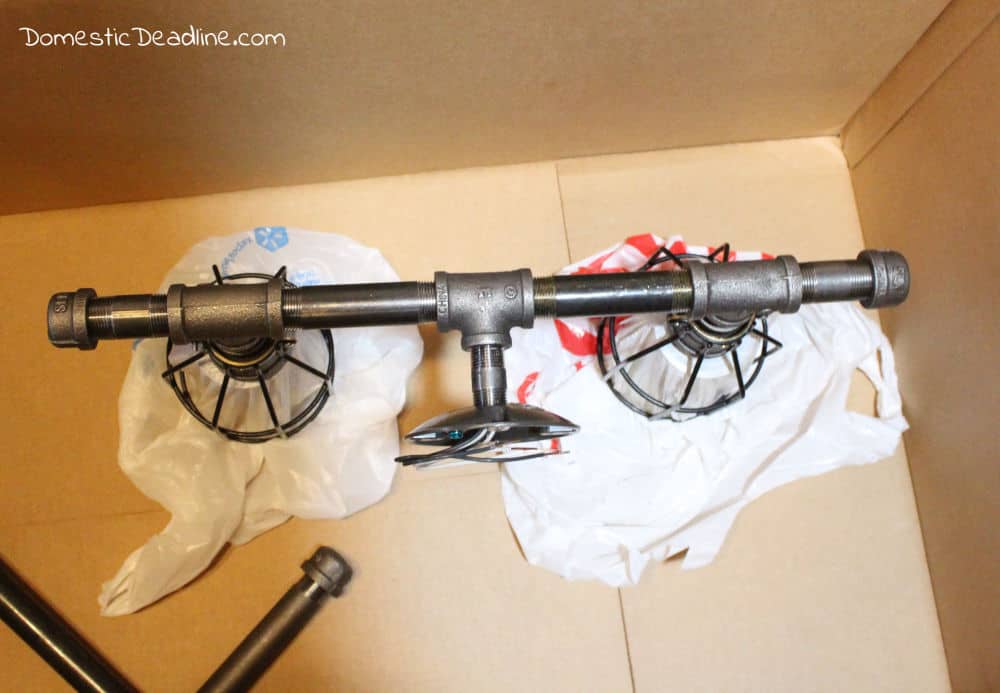
Once the light was assembled, I taped off the wires with painters tape and gave it a few light coats of the hammered finish spray paint.
Installation
Installation of the light was the same as any other light. If you have never installed a light, please consult a local professional if you are unsure.
Turn off the power at the breaker to be safe. An electrical tester will ensure there is no current and it’s safe to install the new light.
It’s black to black, white to white, and ground to the ground again. My light is set up to receive power from the wall switch.
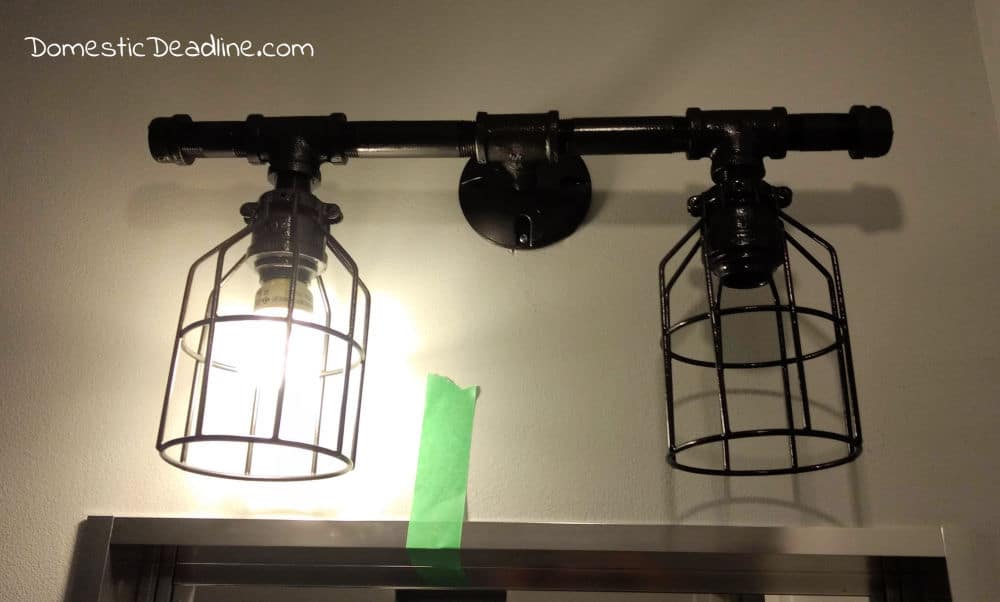
Test it out! If everything is good, shut the power back off and screw the backplate into the electrical box. You’re good to go!
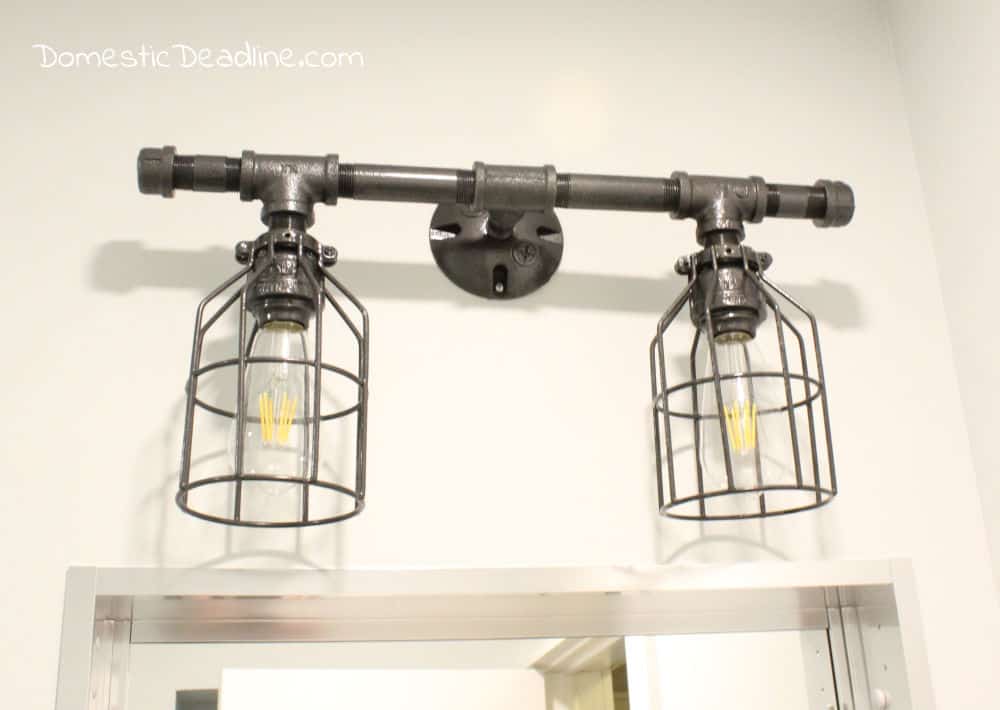
The LED Edison bulb is the perfect finishing touch.
Industrial Pipe Light Fixture
I LOVE how this turned out. I think it might be my favorite part of the bathroom… ok, one of my favorite parts!
When I showed it off to Dave, he had to take a few pictures to keep on his phone.
Next time we were in the plumbing store, he was showing it off to everyone in there!
If I make another one, I now know what parts I’ll need. And I can get them from my plumbing shop. The guys also told me they’d let me go back into the warehouse and design with everything without old guys reminding me it’s gas pipe!
I now plan on making all the lights for the bathrooms in our house. The guys at the shop are telling me I should also make them to sell!
Want to remember this for later? Save this DIY Industrial Pipe Light to your favorite Pinterest Board!

I love this! I hope I can convince my husband we need one of these!
I’m already working on two more… one for the powder room and one for the master bathroom! Unfortunately, my girl’s bathroom is in the eves, so the ceiling is low. They weren’t into the variations I considered so I had to actually buy a fixture.
Hello you mentioned that you attached black to black, white to white and ground to ground however there is no ground wire on the light socket you used here. Where exactly did you attach the ground wire coming from the wall? Many thanks.
Jeff,
Good catch! I apologize for missing that in the post. The backside of the mounting plate I used has a green screw, this is where the wall ground wire was grounded. Sorry for the confusion, it’s why I always suggest you consult an electrician if you are new to working with electricity. I work alongside a professional but am not licensed myself.
Good luck,
Emily
Hi,
Quick question as I have had difficulty with the mounting of homemade light fixtures like this. Were you able to affix the outdoor mounting plate directly into the screw holes of the junction box? My previous lights have just used floor flanges which are too small a diameter so I’ve needed an additional plate of some sort. I had no idea the “outdoor mounting plate” existed! If it works, this will be my new go-to. Thanks so much!
D
Yes! the outdoor mounting plate exactly lined up with the junction box holes!
Do you have kits that I can put together
I do not, I went to my local big box store, bought a bunch of supplies and returned what I didn’t use. I’ve done this each time I make one since I make them custom to the space and no two have turned out exactly alike (ok, none of the 3 have turned out alike, lol)
Love the fixture but do you have a supplies list that specifically tells me what size and type of and how many of everything?
I do not as I made it up as I went along. I’ve made more than one and each one was unique to the space so my supplies were different each time
Do you clean the pipes before spray paint?
How?
With what?
I don’t think I did anything more than wipe them down with a paper towel when I did this originally, but I have also done projects with pipes and have wiped them down with rubbing alcohol before painting, I have no idea if that helps or not.