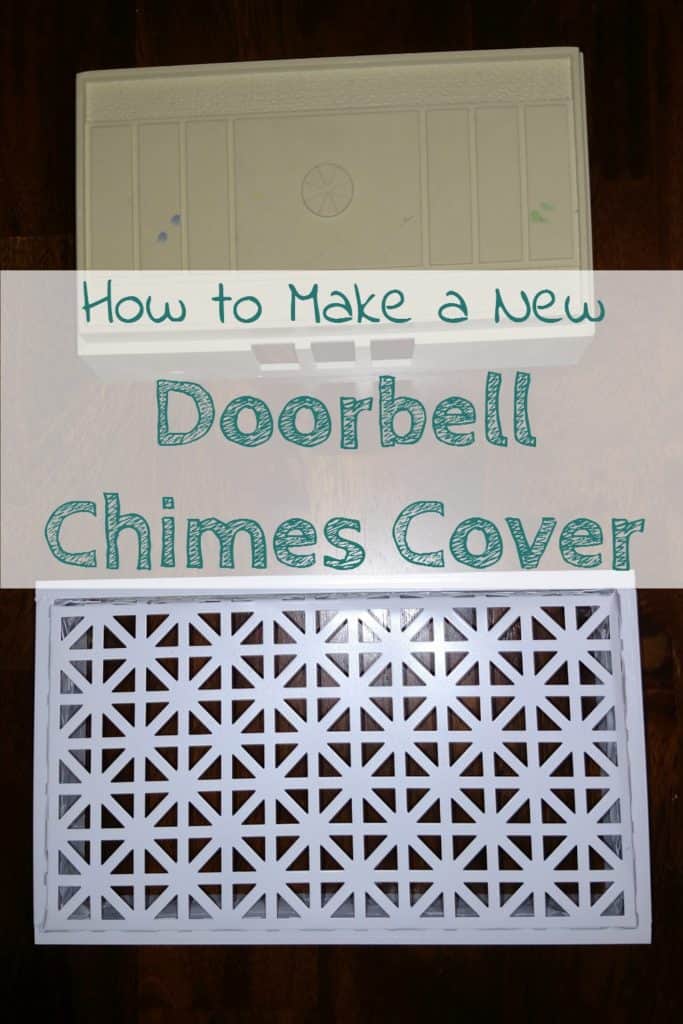
The other week I shared how I made decorative vent covers for my new house. While I was measuring and planning for these I noticed the old, yellowed doorbell wired into the wall in IronFish’s office. Since I had changed out many of the outlets in our house, I looked into changing out the doorbell or door chimes also. Much to my surprise, they can be kinda pricey, or at least more than I thought they would be.
Spray paint was going to be my solution. The wiring of the door chimes looked a bit more complicated than the electrical outlets and I didn’t really know how they were electrically being fed. Circuits were switched off and on but I never figured it out. Truth be told, we still have a few circuits that we don’t know what is on them… as well as a few switches that don’t seem to go to anything either!
Disclaimer – don’t play with electricity, unless you know what you are doing… I’m not a reliable source for how to do electrical work since I’m not a licensed electrician…. just certifiable…. insane that is!
But, the cover was easily removable for spray painting.
And that had been the plan, until suddenly, in the middle of making all my vent covers, I had another idea… Why not make a new cover that matches the vent covers?
All the materials were already in front of me
A few measurements later and this turned out to be a very easy fix. Did I mention that it looks sooooooo much better than the cover that used to be there? Yep, it really does.
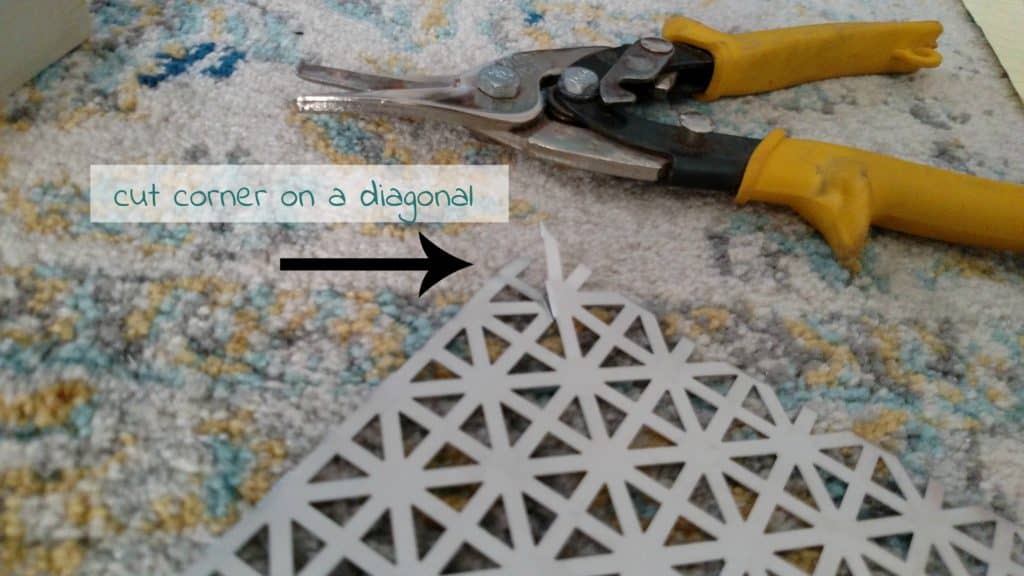
I measured my Union Jack punched sheet metal to be a large enough rectangle to cover the front of the bell chimes. Two extra inches were added to both sides of my rectangle.

These extra two inches gave me an additional inch on each side to fold over and create my box. Cut the corners on a diagonal.
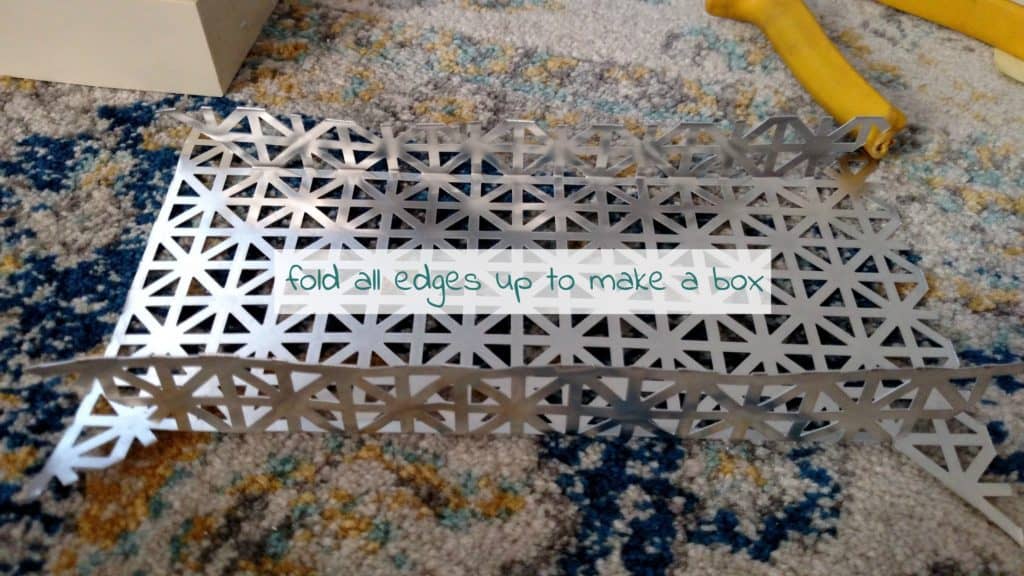
Fold the sides up to create a box. Be sure to fold all four side, overlapping the corners, don’t worry, they won’t be visible later.
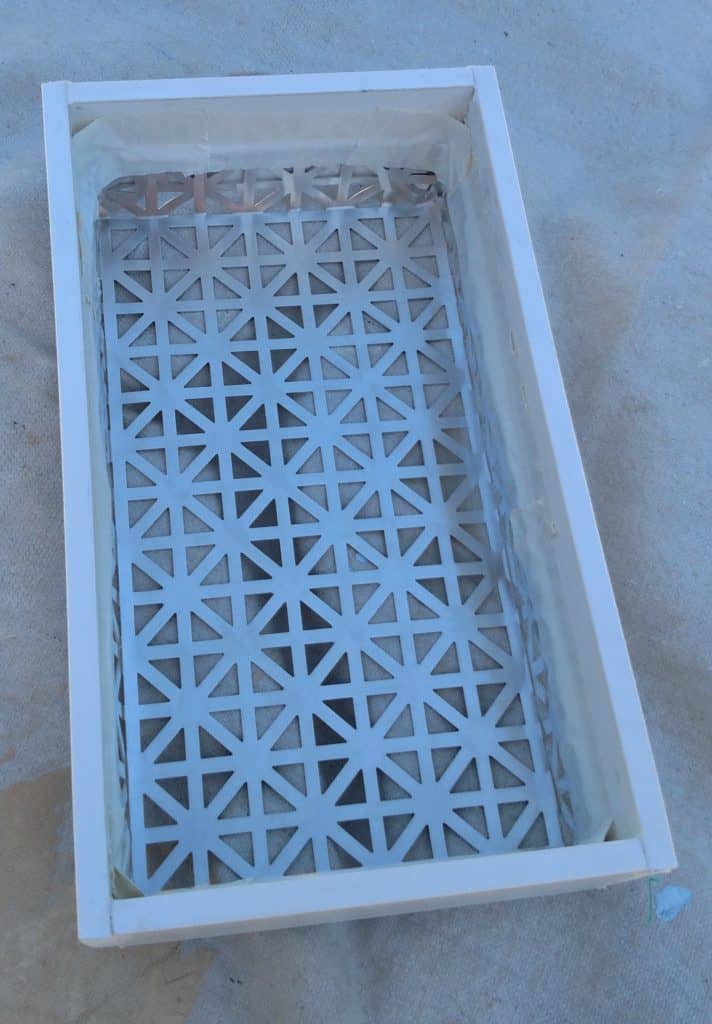
Using lattice trim, cut four sides to length. Gorilla glue the edges together and then around the Union Jack box. Cover the edges of the Union Jack where it meets with the inside of the lattice trim with duck tape. This keeps the gorilla glue from expanding too much and holds it all in place while it dries. This is the best picture I was able to get of the inside of the box:
Spray Paint!
Because it’s fun and dries quickly!
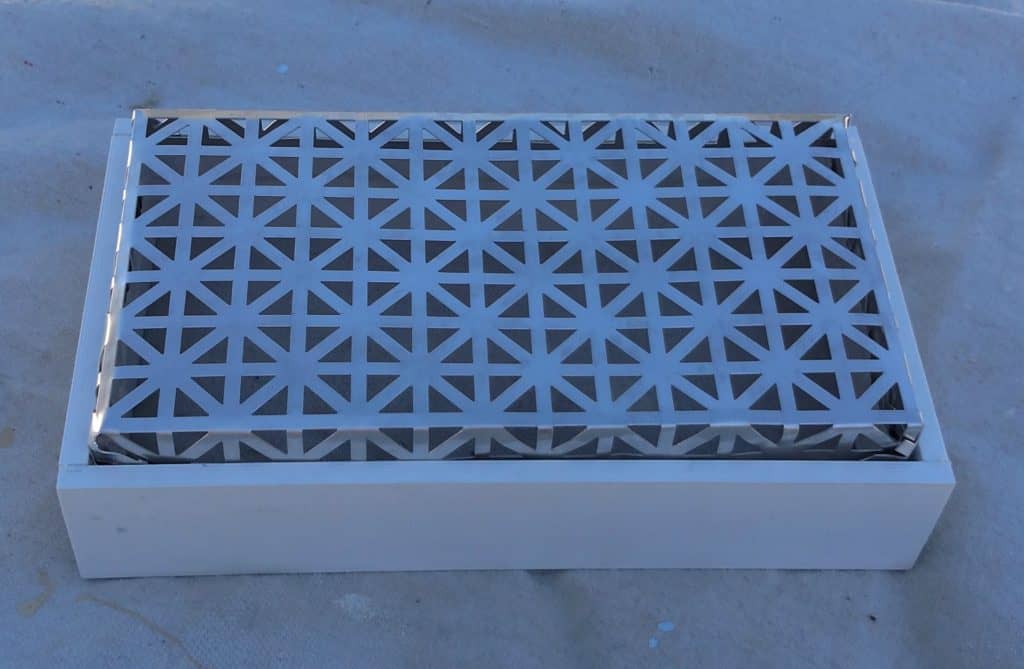
I used two coats of a glossy white. As you can see, I made mine slightly larger than the old doorbell chimes cover. This was slightly intentional… the Union Jack pattern easily folds at certain areas. I didn’t want it to be too snug, so I decided to make it snuggly fit over the old cover to be sure it fit instead of being too small.
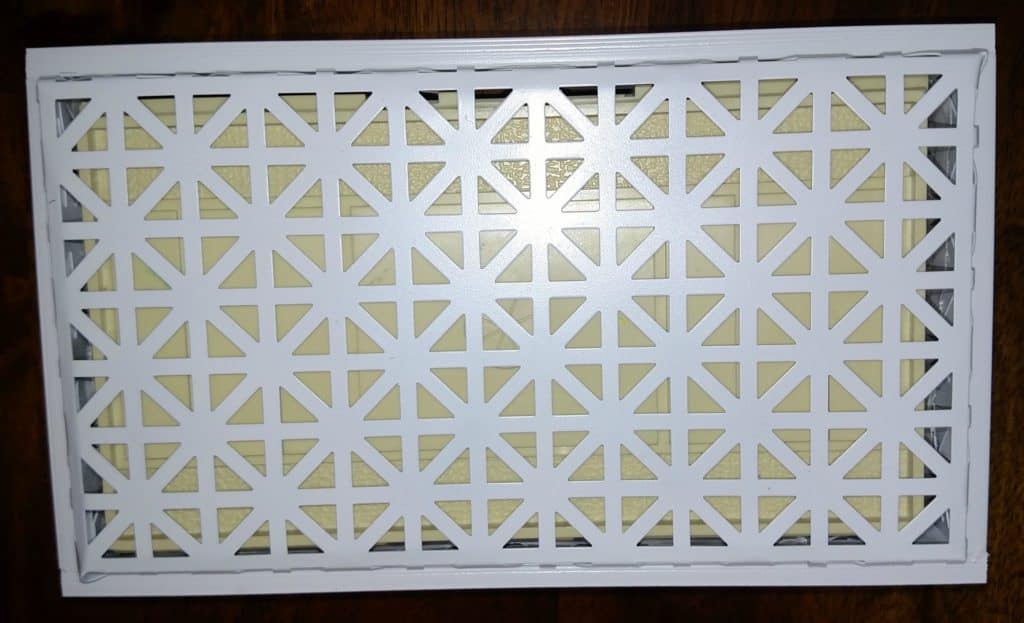
Ok, I’ll admit, I really didn’t know how I was going to attach this to the wall mounted, hard wired bell chimes. Worst case scenario, I was going to spray paint the old box black so that the new one would pop and you’d see the detail of the Union Jack. Then just put the new one over the old one. But, I simply placed the finished new cover over the chimes on the wall and it just stays there!
Before and After
Because it’s always fun to see side by side!
I need to make one of these – our doorbell chimes are in a box similar to your “before” picture. Great idea! Thanks for sharing your DIY doorbell chimes cover at the #HomeMattersParty this week.
It was so worth it and not hard!
I love when you can make things pretty without a trip to the store. Lovely idea, Emily 🙂 #HomeMattersParty
Rock what you’ve got!
Isn’t it the best when you can reuse something you already have. Saves coin, time and the environment.
You new doorbell cover is a big improvement over the old one. Looks great!
Have a great week and we will connect when we co-host the #HomeMattersParty
Thanks for stopping by!
Such a clever idea!!! Definalty makes the doorbell look so much prettier now! Sure is fabulous too when you already have all of the material for the project at hand.
My favorite projects usually are the ones that come from stuff I have already.
Great makeover your Doorbell cover looks great
Thank you!
That’s a very attractive update and one most people could do. Thanks for sharing with us at Creatively Crafty #ccbg 🙂
Thanks, yep, not really too hard
Emily,
The door bell cover is brilliant. I love how you changed look while keeping the style of the time of your home in mind. Thanks for sharing with TADA!
Karen Marie
Thanks, it really does look so much nicer!
The doorbell chime looks a lot nicer now – those old plastic ones are hideous !!
This is so great. We did a thermostat cover too only we did shelves with frames over it cause it was so ugly. I love yours. If I would have seen this prior I would have made it! Great job.
Thanks for linking up to #wasternotwednesday
I love this am definitely trying it thank you so much for the ideas!!!
What a great idea! You are super creative! I love seeing how you DIY such crafty things on a budget! #HomeMattersParty
Yes, door bell chimes are pricey! We have been looking at them as well, as our doorbell rarely works. I hate the old yellowed chime box hanging in our hallway. This is a great idea. Thanks for sharing at the #HomeMattersParty 🙂
~Lorelai
Life With Lorelai
Really great idea! Awesome picture. I will try this