Another edition of my DIY adventures in renovating my kitchen. Because I have champagne taste on a beer budget, not only were we doing the much of the labor ourselves but the customization so we could get the best bang for our buck. The cabinets I selected have the soft close doors and drawers and the overall look I wanted but cost less because custom sizes aren’t available. I could have saved even more by not having so many drawer base cabinets, but that wasn’t something I was willing to give in on. I did save by doing the customization of a few of my cabinets myself.
Skill Level
I should say, while I am doing this myself, my skill level is a bit higher than the average homeowner. For the past 6 years, I’ve been working part-time for a contractor, Dave. And by that I mean, I get my kids off to school, physically work alongside Dave on a kitchen or bathroom renovation for a client, and get home in time for my son to get home from school. If Dave says “take that wall down,” that’s what we do. If he says today we’re tiling, then we tile. When he says, “move that light fixture,” I say, “ok, but first I’m turning off the breaker.”
He’s taught me well.
This is the perfect job for me. Not only have I learned so much (and enjoy all of it), but when the kids are sick, have a field trip or doctor’s appointment, Dave and I can make that work. Plus, I have access to all the tools I need for any renovation project. Dave is also willing to help me and give me advice on my projects (employee perks!).
So, you can see how my skill level for many projects is more than tinkering.
And by doing this myself, I should also say I had a lot of help from IronFish, a little help from Dave and some help from friends who stopped by to see the progress and said, “What can I do to help?”
That being said, making some customization of standard cabinets was one of my easier projects and something I think anyone who is handy with a saw, nail gun and paint can handle.
Microwave Cabinet
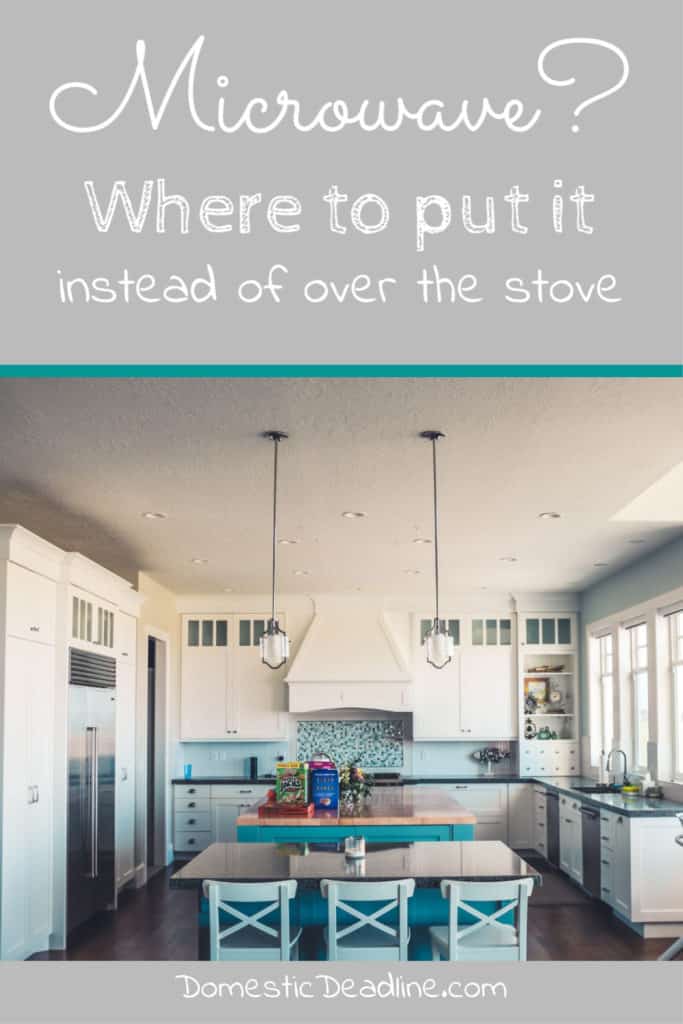
I knew I didn’t want a microwave above the stovetop. I know this makes sense for some kitchens.
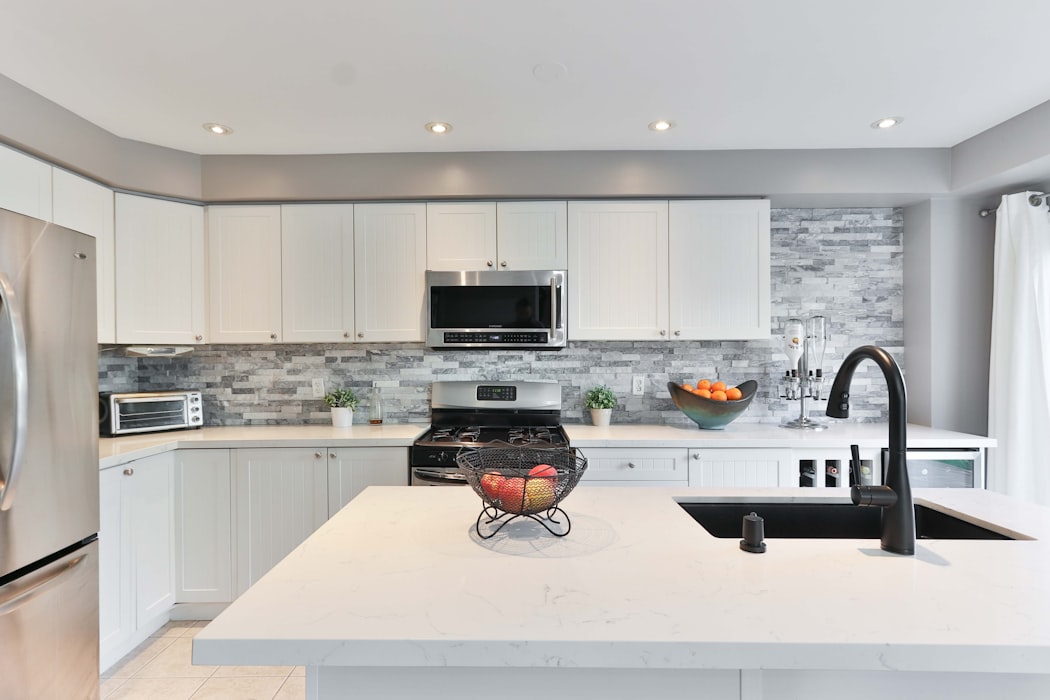
Been there, done that. I love a range hood. Something different and of course, something I create

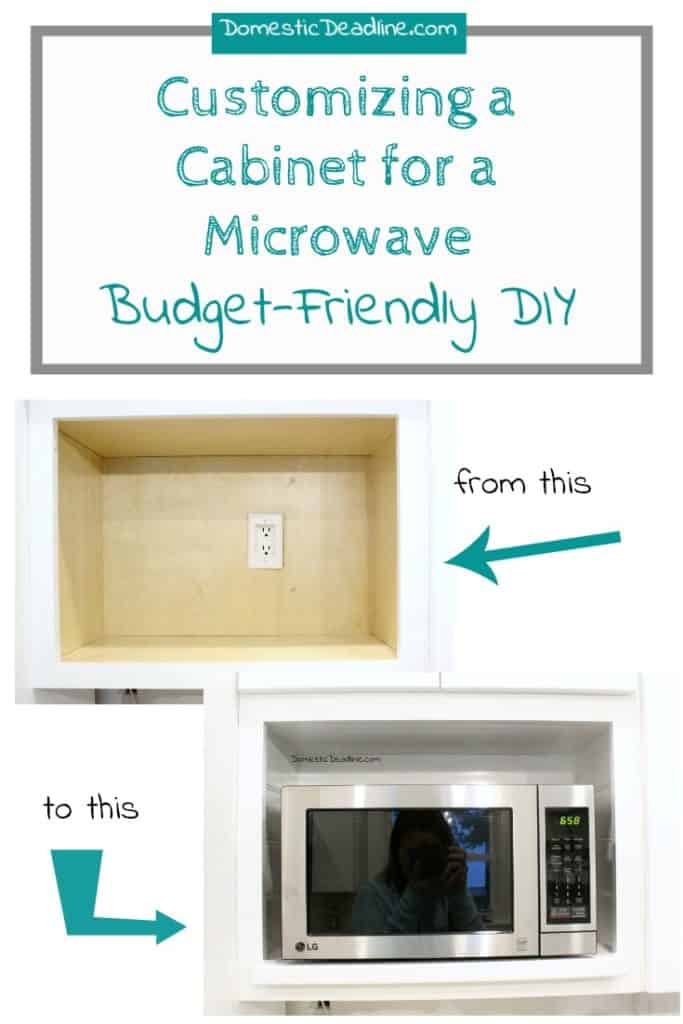
That meant the microwave had to go someplace else. I also didn’t want it sitting on the countertop. In this day and age that would look like I’d forgotten to plan for it! My cabinet manufacturer did have a few options for microwave cabinets. Here were my choices:
1. I could have selected their microwave cabinet. It was slightly deeper than the traditional 12” deep upper cabinets (15″). I would have had to purchase the type of microwave intended on going into a cabinet with a trim kit. Those can get pricey.
2. They will make a cabinet that looks like all my others (same doors) but was 18″ deep.
3. Another option would be a finished inside cabinet. Of course, then this one doesn’t have doors.
All 3 of these options still required me to do additional customizing. Plus, they were all considerably more money than any of my other upper cabinets.
I only wanted a small microwave. Something big enough to make microwave popcorn and reheat leftovers. Not the mammoth size that fits a casserole dish!
That’s when I came up with option 4. I would get 2 cabinets at 24″ in width (because the base cabinet below is 24″ wide). The top cabinet would be 24″ tall, the bottom cabinet, 18″. Together they add up to 42″, the height of all my other upper cabinets.
The top cabinet doesn’t have to be open and exposed. Then I only had to modify the bottom cabinet.
Customizing the Cabinet
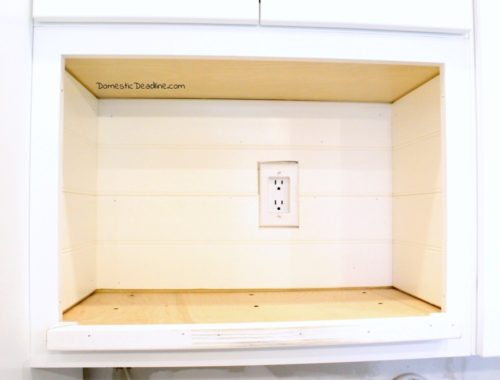
The first thing I did was to remove the doors and hinges.
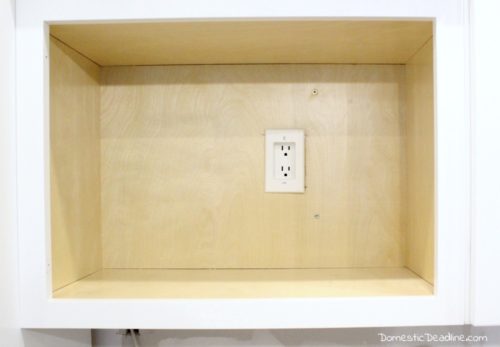
When we laid out the electrical, we placed an outlet within the cabinet. Once the cabinet was installed we used a recessed plug outlet.
Next, we measured and cut a piece of 3/4″ plywood to fit inside the cabinet and extend outwards an additional 2 inches. These 2 inches were determined based on the depth of the microwave itself. A deeper microwave would require a deeper shelf.
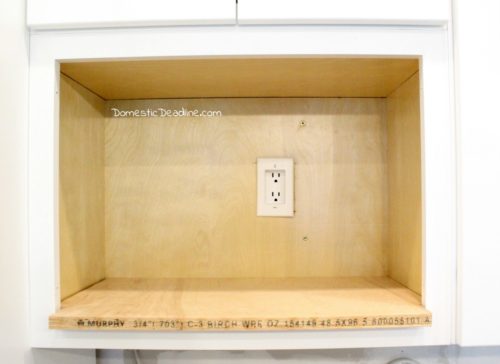
Our jigsaw easily notched the shelf to fit behind the cabinet frame. The shelf was screwed into the cabinet in several places.
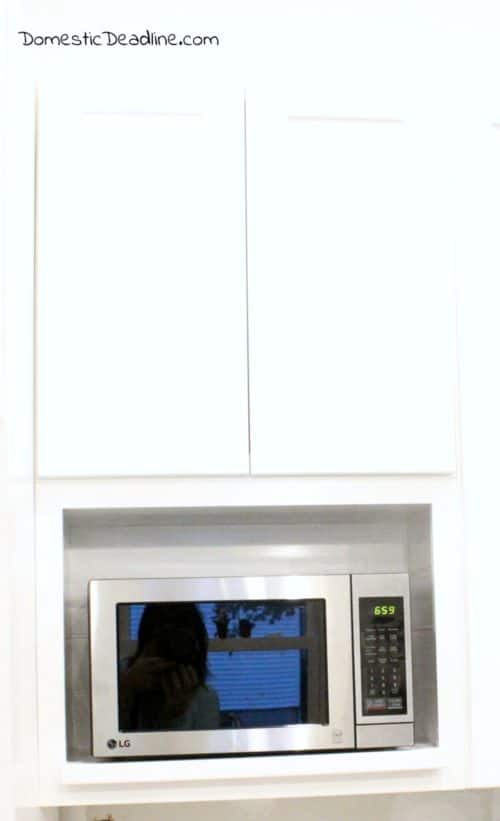
Then, it was time to cover up the ugliness! Using corner molding, IronFish trimmed out the front of the shelf.
With construction adhesive and brad nails, I applied wide plank PVC beadboard scraps to the inside of the cabinet.
Apparently, I forgot to take a picture of the next step. But, we filled all the nail holes, caulked all the joints and painted the inside and front trim white to match the exterior of the cabinets.
Then we plugged in the microwave!

And I climbed inside to take a picture! Haha, I hadn’t realized until I went to crop my pictures and saw them enlarged on my computer that my reflection was caught!
The next picture is terrible, I will have to take a new one! But, I wanted to give you an idea of how the microwave looks with the upper cabinet.
You get another one of my reflections with it!
Overall, the entire project only took an afternoon. I waited until the paint had dried a full day before putting the microwave inside.
With the right tools, this is a very easy job. Since I only had to buy a quarter sheet of the 3/4″ plywood, this option definitely saved me tons of money!
Sometimes putting a little creativity and work in results in the perfect solution.
WANT TO REMEMBER THIS? POST THIS CABINET CUSTOMIZING TUTORIAL TO YOUR FAVORITE PINTEREST BOARD!
This looks so nice! Great instructions… love the pictures 🙂 . You are very handy. (Pinning)
#wearepinnable
Thanks, I’m happy to hear you like the instructions, I’m always afraid I’m not explaining well enough!
I don’t like the microwave on the top of the stove either. Great tutorial, Emily. #HomeMattersParty
Thanks!
I think your instructions and the step by step pics are great. I have to see things (usually) for them to make more sense. I know it takes more time to take pictures as you do something, but I really appreciate you doing it. I’m sure others do, too.
I love how your microwave nook turned out, it looks great!
Stopping by from the #HomeMattersParty linky. Have a great week!
Thanks! I often can visualize things, but I know how helpful it is to see pictures. Sometimes I have to find pictures to describe what I’m thinking for my husband. Thankfully over the years he has gotten to a point where he says, go ahead, even without me showing him pictures!
Such a clever update of a cabinet Emily
Thank you!
Your custom kitchen is going to be incredible with all the well thought out steps your incorporating into it. I actually have a cupboard like this for my microwave but always thought the ones over the stove were a great option. Was it lack of space thats the problem. I would be interested to know your thoughts.
Not lack of space at all. I just don’t like the look of it. I think it makes the kitchen look too cookie cutter and not custom. I know it serves a great function and works there for some people, I just don’t like the look!
OMG, great minds.
I took two, 24″ wide cabinets and cut them roughly in half, horizontally. I attached them to make a 39″ cabinet! I cut an outlet in the back. I made a face frame to create the illusion that the top cabinet was 24″ tall (put a shelf in there) and left the bottom open for my microwave! LOL! I didn’t do the bottom shelf, though, because I want to find a smaller microwave for the same purposes. My cabs are 13″ deep because 1) I made them and 2) they’re beaded inset so it gives me a tad more depth.
Just making the doors now.
Great job!
That is awesome! I love thinking outside the box!
this looks fab, so perfect for a stylish kitchen #DreamTeam
Way to jazz up that boring old microwave cabinet! I love it! 🙂
Wonderful solution! Like you, I just like to have a small microwave big enough to reheat a plate of food. I’ve never really cooked in a microwave. Can’t stand a microwave on the counter, though, so this is the perfect solution.
I don’t like the look of microwaves, but don’t want to live without one. I definitely don’t want it on the counter I like your idea!